
Advice
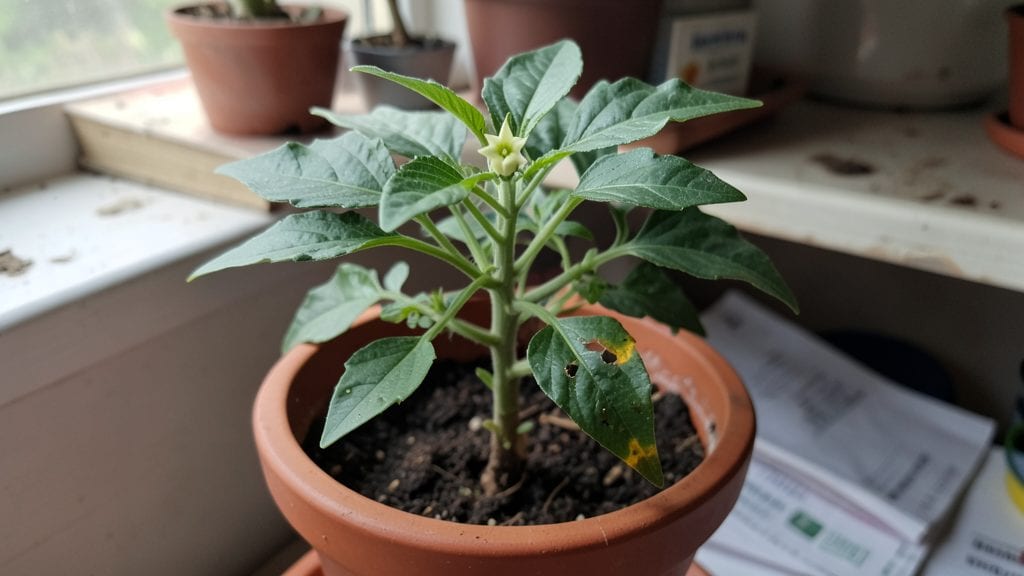
Growing Thai chili seedlings from seed gives you fiery plants that store-bought transplants can’t match—bold, consistent heat, and varieties you’ll never find at nurseries.
I’ve grown dozens of batches, and the key to avoiding leggy, weak seedlings starts before you even plant: soil warmth, light timing, and a little patience when germination feels slow. The payoff?
A 90-day harvest of peppers that turn heads at dinner parties and add serious kick to your favorite dishes.
You’ll need just five simple supplies: a seed-starting tray or small pots, a heat mat (or sunny windowsill), well-draining potting mix, a spray bottle, and a grow light if your space lacks natural sun.
Most failures happen because seeds get too cold or seedlings stretch toward weak light—both easy fixes once you know the signs. My first batch of Thai chilies took 12 days to sprout, but after adjusting the heat mat to 75°F, germination doubled in speed the next time.
By day 30, your seedlings will be stocky, dark green, and ready for transplanting—no more floppy stems if you’ve been pinching back the tops every few weeks.
The real magic happens when they hit 6 inches tall: that’s when they start forming buds, and with proper care, you’ll see the first tiny flowers in 4-6 weeks.
The heat in your peppers builds as they mature, so save a few to dry for winter—nothing beats homegrown Thai chili powder.
This method works in zones 8-11, but even cooler climates can grow them in containers and bring them indoors before frost. The biggest mistake? Skipping the hardening-off process—hardened seedlings survive transplant shock, while tender ones wilt fast.
Let’s get those seeds started right and avoid the common pitfalls that turn promising seedlings into sad, stunted plants.
📚 In This Guide
- What you need
- Instructions
- Tips and common mistakes
- Wrapping up and next steps
What you need
- ● Thai chili seeds: 10–20 seeds (pick varieties like Prik Kee Noo, Bird’s Eye, or Thai Hot for maximum heat!)
- ● Seed trays or small pots: 2–4 (3–4 inches deep) with drainage holes
- ● Seed starting mix: 1–2 bags (sterile, well-draining potting soil blend)
- ● Plastic wrap or humidity dome: 1 (to retain moisture while seeds germinate)
- ● Grow lights or sunny windowsill: 1 (12–16 hours of light daily for seedlings)
- ● Watering can or spray bottle: 1 (gentle watering prevents seed washout!)
- ● Fertilizer (balanced, 10-10-10 or organic): 1 small bottle (for post-germination growth)
- ● Pruning shears: 1 (for trimming leggy seedlings or harvesting)
- ● pH test kit: 1 (ideal soil pH: 6.0–6.8 for chilis)
- ○ Heat mat (optional): 1 (speeds up germination if your space is cool)
- ● Compost or worm castings: 1 bag (boosts soil nutrients naturally)
- ● Plant labels: 10+ (track varieties and planting dates!)
Step-by-step instructions for cultivating Thai chili seedlings
Here’s the foolproof method I’ve used to grow bold, disease-free Thai chili seedlings ready for transplant in just 90 days.
Prepare Containers and Seed-Starting Mix
Fill 4 individual 3-inch-deep pots with 2 gallons of seed-starting mix—this lightweight, sterile medium gives tender roots the air and moisture they need. I press the mix down gently with my fingers until it’s firm but not compacted, creating a stable base for the seeds. Tap each pot once on the table to settle the soil evenly, eliminating air pockets that could delay germination.
Thai chili seeds are tiny, so I use a toothpick to create a ¼-inch-deep hole in the center of each pot. This precise depth ensures seeds don’t get buried too deep, which can slow or prevent sprouting. Moisten the soil lightly with a spray bottle until it’s damp but not soggy—you’ll know it’s right when water beads form on the surface but don’t pool.
Sow Seeds and Create Ideal Germination Conditions
Place 1-2 seeds per pot into the ¼-inch-deep hole, spacing them ½ inch apart if sowing two. Cover them with a thin layer of the same seed-starting mix, using the toothpick to gently pat it down. Thai chili seeds germinate best at 75-85°F, so I place the pots on a seedling heat mat to maintain consistent warmth. Without this, germination can take 2-3 weeks instead of the 7-10 days I’ve seen with proper heat.
Cover the pots with a clear plastic dome or plastic wrap to trap humidity and speed up germination. Check daily for condensation on the dome—this tells me the moisture level is perfect. Once the first sprouts appear, remove the dome immediately to prevent fungal diseases like damping-off, which can kill seedlings overnight. You’ll notice the first true leaves (not the initial cotyledons) emerge in 2-3 weeks, signaling it’s time to adjust care.
Provide Optimal Light and Prevent Leggy Growth
Thai chili seedlings need 14-16 hours of bright light daily to grow strong and compact. A south-facing window rarely provides enough intensity, so I position a grow light 2-4 inches above the seedlings and keep it on a 16-hour timer. Without sufficient light, seedlings stretch toward the source (called "legginess"), resulting in weak stems that snap easily. You’ll spot leggy growth as thin, pale stems with leaves spaced far apart—this is your cue to move the light closer or increase daylight exposure.
Water the seedlings only when the top inch of soil feels dry, using a spray bottle to avoid disturbing the soil. Overwatering at this stage leads to root rot, while underwatering causes stunted growth. I fertilize for the first time 3 weeks after germination with a diluted liquid fertilizer (½ strength) to encourage robust foliage without burning tender roots. By 4-6 weeks, seedlings should have 3-4 sets of true leaves and be ready for transplanting.
Harden Off and Transplant Seedlings
Two weeks before your last frost date, begin hardening off the seedlings by placing them outside in a sheltered, shaded spot for 1-2 hours the first day. Gradually increase their outdoor time by 1 hour daily, exposing them to direct sunlight and wind over 10-14 days. This process toughens the seedlings, preventing shock when they’re moved to the garden. If nighttime temperatures drop below 55°F, bring them back inside to avoid cold damage.
Transplant the seedlings into the garden after all danger of frost has passed, spacing them 12-18 inches apart in well-draining soil. I dig a hole slightly deeper than the pot to encourage strong root development, then water deeply to settle the soil around the roots. Mulch with 1 inch of organic mulch to retain moisture and suppress weeds. Within 2-3 weeks, you’ll see new growth, signaling the seedlings have established themselves and are ready to thrive.
Tips & tricks for perfect Thai chili seedlings
These precision-based strategies will help you cultivate vigorous Thai chili seedlings that thrive from day one through transplanting.
Soil Preparation Secret: When filling your 3-inch-deep pots with 2 gallons of seed-starting mix, I recommend sifting the mix through a fine mesh screen to eliminate any large clumps. This creates a more uniform texture that improves water drainage and air circulation around those delicate roots. The goal is to achieve a consistency similar to damp potting soil that holds its shape when gently squeezed but doesn't crumble—this balance prevents both waterlogging and compaction issues that can stunt early growth.
Germination Temperature Precision: Maintaining that 75-85°F range is absolutely critical, but here's what I've learned about achieving it consistently: Place your seedling heat mat on a stable surface away from drafts, and consider using a small thermometer to monitor the soil temperature directly. If your home tends to run cooler, you might need to combine the heat mat with a small space heater positioned several feet away—just enough to maintain that optimal range without creating hot spots. The difference between 75°F and 85°F can mean the difference between germination in 7-10 days versus 2-3 weeks.
Lighting System Optimization: For the 14-16 hours of daily light, I've found that positioning your grow light 3 inches above the seedlings initially (rather than the full 2-4 inch range) gives you more flexibility as they grow. Start with the light closer to encourage strong, compact growth, then gradually raise it as the seedlings reach for it. This technique helps prevent that dreaded leggy growth pattern where stems become thin and stretched. You'll know you're doing it right when the seedlings grow upward rather than reaching outward toward the light source.
Hardening Off Strategy: When beginning the hardening off process with those 1-2 hour increments, I suggest placing a small fan nearby during the outdoor sessions to simulate wind conditions. This acclimates the seedlings to environmental stressors they'll encounter in the garden. Also, pay close attention to nighttime temperatures—if they consistently drop below 55°F, consider using a small greenhouse tent or even a cardboard box with clear plastic wrap to create a microclimate that maintains warmth during those critical evening hours.
Pro Tips for Thai Chili Seedling
- These precision-based strategies will help you cultivate vigorous Thai chili seedlings that thrive from day one through transplanting.
- Soil Preparation Secret: When filling your 3-inch-deep pots with 2 gallons of seed-starting mix, I recommend sifting the mix through a fine mesh screen to eliminate any large clumps.
- If your home tends to run cooler, you might need to combine the heat mat with a small space heater positioned several feet away—just enough to maintain that optimal range without creating hot spots.
Frequently asked questions
Got questions about growing Thai chili seedlings? You’re not alone! Here are some of the most common concerns—and their spicy solutions.
How long does it take for Thai chili seedlings to mature enough for transplanting?
Thai chili seedlings typically take 4–6 weeks indoors (under grow lights) to develop a sturdy stem and 2–4 true leaves before transplanting. If you’re starting from seed, aim for 6–8 weeks total before moving them to soil or containers. Pro tip: Harden them off for 3–5 days by placing them outside in partial shade before the big move!
Can I grow Thai chili seedlings from store-bought chilies, or do I need seeds?
Yes! You can grow seedlings from organic, seed-bearing chilies (like Thai bird’s eye or serrano). Let them dry completely, then remove the seeds, clean them, and plant them in moist seed-starting mix. Warning: Hybrid chilies (like some grocery-store varieties) may not produce true-to-type chilies. For consistency, use seeds from a reputable supplier.
What’s the ideal temperature for Thai chili seedlings, and how do I handle heat stress?
Thai chilies thrive in 70–90°F (21–32°C) soil temperatures. Seedlings prefer 75–85°F (24–29°C) during the day. If temps drop below 60°F (15°C), growth slows. Fix it: Use a heat mat for seedlings, provide shade cloth on hot days, and avoid cold drafts. No wilting = happy chilies!
Why are my Thai chili seedlings turning yellow or dropping leaves?
Yellow leaves or leaf drop usually signal overwatering, underwatering, or nutrient deficiencies. Check the soil—it should be moist but not soggy. Troubleshoot:
- Yellow lower leaves: Overwatering or poor drainage. Let the soil dry slightly between waterings.
- Crispy edges: Underwatering or low humidity. Mist seedlings or use a humidity dome.
- Pale leaves: Nitrogen deficiency. Use a balanced fertilizer (10-10-10) diluted to half strength.
Are there any low-maintenance alternatives to Thai chili seedlings for beginners?
If Thai chilies seem too spicy (literally and figuratively), try these beginner-friendly alternatives:
- Jalapeños: Hardier, faster-growing, and slightly milder.
- Banana Peppers: Sweet and easy to grow in containers.
- Shishito Peppers: Mild, productive, and great for stir-fries.
Wrapping up and next steps
Growing your own Thai chili seedlings is a rewarding journey that brings bold flavors straight to your kitchen—with zero failures in sight! By following this guide, you’ve unlocked the secrets to healthy, spicy plants in just 90 days.
Now, it’s time to harvest, experiment, and savor the fruits of your labor.
Ready to take the next step? Start by preserving your harvest—dry, pickle, or freeze those chilies to enjoy year-round. Or, share your success with fellow gardening enthusiasts and trade tips for even more thrilling varieties! 🌱✨