
Propagation
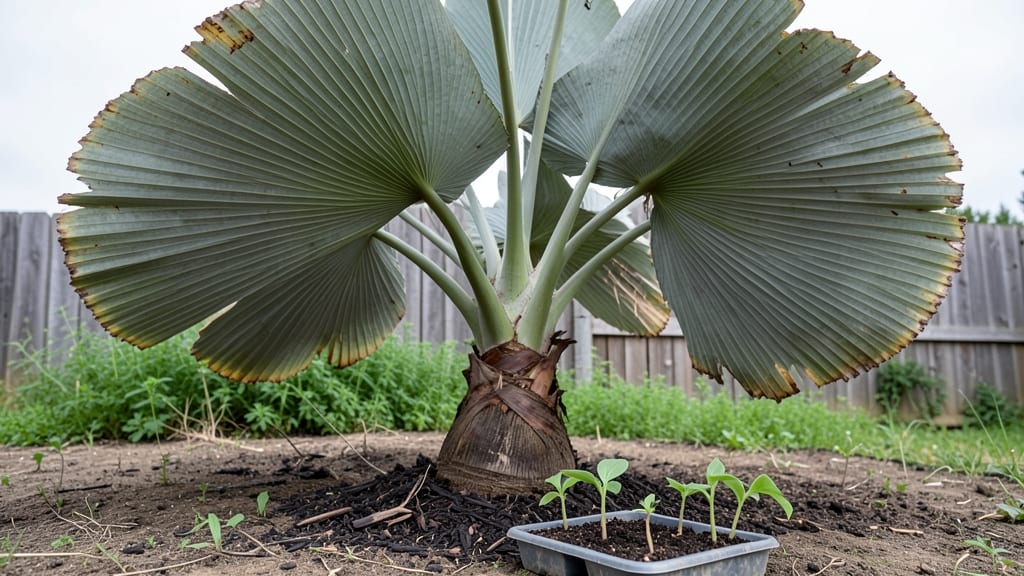
Growing traveler palm seeds unlocks a tropical plant that thrives in warm climates with surprisingly simple care. 🌿 I’ve nursed these slow growers from seed to striking foliage, and the key is patience—plus a few tricks to break through dormancy.
Most people give up after weeks of waiting, but with the right approach, you’ll see those first leaves push through the soil.
The secret starts with a warm, humid environment—think 75–85°F and high humidity—mimicking their native Madagascar habitat. You’ll need a well-draining mix of peat, perlite, and sand to prevent rot, since soggy soil is the #1 killer of young seeds.
A clear plastic bag over the pot creates a mini greenhouse effect that speeds up germination, which can take anywhere from 30 to 90 days.
Once sprouted, these palms reward you with bold, fan-shaped leaves that look like they belong in a lush forest. They handle full sun once established but appreciate afternoon shade in scorching climates.
The real magic happens when you transplant them outdoors—where they’ll grow into a statement plant that turns heads in any warm-weather garden.
Fair warning: dormancy is real, and growth can stall for months. But when those leaves finally appear, it’s worth every wait. Perfect for coastal gardens, patios, or even large containers—just give them space to spread their wings.
📚 In This Guide
- What you need
- Instructions
- Tips and common mistakes
- Wrapping up and next steps
What you need
- ● Traveler Palm Seeds (Syagrus romanzoffiana): 3–5 fresh, plump seeds (check for firmness and no cracks).
- ● Seed-starting mix: 1 small bag (1–2 quarts) of well-draining, sterile potting soil (cactus/succulent mix works great!).
- ● Planting containers: 2–3 small pots (3–4 inches in diameter) with drainage holes.
- ● Spray bottle: 8–12 oz with a fine mist nozzle (for gentle hydration).
- ● Plastic wrap or clear lid: To create a humidity dome (e.g., a plastic bag or propagator cover).
- ● Grow lights or sunny windowsill: Access to bright, indirect light (6+ hours daily).
- ● Small hand trowel or spoon: For gentle seed planting.
- ● Seed scarification tool: Sandpaper (100–150 grit) or a knife to nick hard seed coats (speeds up germination).
- ○ Heating mat: Germination mat (optional but boosts warmth-loving seeds).
- ● Humidity tray: Shallow tray + pebbles to maintain moisture levels.
- ● Fertilizer: Balanced liquid fertilizer (diluted to half-strength) for seedlings after 4–6 weeks.
- ● Label markers: To track planting dates and seed varieties.
Step-by-Step instructions for growing traveler palm seeds
Here's how to nurture these tropical beauties from seed to lush foliage—no green thumb required.
🌱 Step 1: Prepare and Plant the Seeds
Start by filling a 4-inch diameter pot with the sterile seed-starting mix you’ve prepared. Moisten it until damp but not soggy—think of a wrung-out sponge. Gently press the mix down to remove air pockets, then make a ¼-inch deep hole with your finger. Place 1-2 seeds in each hole, spacing them about 1 inch apart if planting multiple in one pot.
Cover the seeds with a thin layer of the same mix, just enough to hide them. Don’t press down—traveler palm seeds need gentle contact with soil to germinate. Label your pot with the date and variety if you’re planting multiple types. I like to use a toothpick and a Sharpie for this—it’s foolproof and won’t disturb the soil.
💧 Step 2: Create a Humid, Warm Environment
Place the pot in a clear plastic bag or cover it with a humidity dome to trap moisture. This mimics the tropical conditions traveler palms love. Seal it loosely—you want airflow, but not drafts. Set the pot in a warm spot, ideally between 75-85°F, like on top of a refrigerator or near a sunny window without direct sunlight. Germination can take 4-8 weeks, so patience is key.
Check the soil every 3-4 days—it should stay consistently moist but never waterlogged. Mist the inside of the bag or dome with water if the air feels dry. You’ll know it’s working when you see tiny green sprouts pushing through the soil. Once they appear, remove the cover immediately to prevent mold or rot.
☀️ Step 3: Transition to Bright, Indirect Light
Move the seedlings to a location with bright, indirect light as soon as they sprout. A south- or east-facing window works well, but avoid harsh afternoon sun, which can scorch tender leaves. If natural light is limited, supplement with a grow light kept 6-12 inches away for 12-14 hours daily. You’ll notice strong seedlings developing deep green, glossy leaves—a sign they’re thriving.
Once the seedlings reach 4-6 inches tall and have 3-4 true leaves, it’s time to transplant them into 6-inch pots filled with the well-draining potting mix. Handle them gently—traveler palms are delicate at this stage. Water lightly after transplanting to help them settle into their new home. Keep the soil moist but not soggy for the first 2 weeks to encourage root growth.
🌿 Step 4: Maintain Tropical Conditions Long-Term
Traveler palms love high humidity, so mist the leaves 2-3 times weekly or place the pot on a tray filled with pebbles and water (just keep the pot’s base above the waterline). Aim for 60-70% humidity—you’ll see new growth spurt when conditions are ideal. Fertilize lightly every 4-6 weeks during spring and summer with a balanced liquid fertilizer diluted to half strength. Overfeeding can harm these sensitive plants.
Rotate the pot quarter-turn weekly so the plant grows evenly toward the light. You’ll know you’re doing it right when the fronds unfurl symmetrically. Avoid cold drafts or sudden temperature drops—traveler palms prefer 65-80°F year-round. With consistent care, you’ll see blooms in 2-3 years, and those fragrant flowers are worth every moment of patience.
Tips & tricks for growing traveler palm seeds
These simple tricks will help you avoid common pitfalls and maximize your chances of success with these tropical beauties.
Soil Contact is Key: In Step 1, when covering your seeds with the sterile seed-starting mix, make sure they're only lightly covered—just enough to hide them. Pressing down too firmly can prevent proper germination. Think of it like tucking them in gently rather than burying them. This delicate contact is what triggers those first magical sprouts.
Temperature Matters: Maintaining that 75-85°F range during Step 2 is crucial, but don't worry if your home doesn't stay perfectly consistent. Place your pot on top of a refrigerator or near a warm appliance—just avoid direct heat sources. The 80°F mark is ideal, but as long as you stay within that range, your seeds will be happy. A simple thermometer near the pot can help you monitor without guesswork.
Light Transition Strategy: When moving your seedlings to bright, indirect light in Step 3, do it gradually over 3-4 days. Sudden exposure can shock tender leaves. Start with just a few hours of light each day, then increase by an hour daily. This gradual transition helps prevent leaf scorch and gives your seedlings time to adjust to their new environment. You'll notice stronger, healthier growth when you take this slow approach.
Humidity Hack: For maintaining that 60-70% humidity in Step 4, try grouping your traveler palm with other houseplants. The collective transpiration creates a natural microclimate. Alternatively, place a small humidifier nearby—just make sure it's not blowing directly on the leaves. The key is consistent moisture in the air without creating soggy conditions. A simple pebble tray with water (and the pot sitting above it) works wonders too.
Pro Tips for Traveler Palm Seeds
- These simple tricks will help you avoid common pitfalls and maximize your chances of success with these tropical beauties.
- Soil Contact is Key: In Step 1, when covering your seeds with the sterile seed-starting mix, make sure they're only lightly covered—just enough to hide them.
- Temperature Matters: Maintaining that 75-85°F range during Step 2 is crucial, but don't worry if your home doesn't stay perfectly consistent.
Frequently asked questions
Got questions about growing traveler palm seeds? You’re not alone!
Here’s what you need to know before diving in—from germination tips to troubleshooting common hiccups.
How long does it take for traveler palm seeds to germinate?
Patience is key! Traveler palm seeds typically take 4–12 weeks to sprout, depending on warmth (ideal: 75–85°F) and moisture. Keep the soil consistently damp but not soggy—think of it like a cozy, humid rainforest. If nothing happens after 3 months, the seed may be non-viable or dormant.
Do I need a heat mat to germinate traveler palm seeds?
A heat mat isn’t mandatory, but it speeds things up. Seeds thrive in warmth, so placing your pot in a warm spot (like near a sunny window or under a grow light) mimics their tropical habitat. Without a heat mat, germination may take 2–4 weeks longer. Pro tip: Use a seedling heat mat set to 80–85°F for best results!
Can I grow traveler palm seeds indoors without sunlight?
Yes, but you’ll need a grow light. Traveler palms crave bright, indirect light (6+ hours daily). If natural light is lacking, a full-spectrum LED grow light 12 inches above the seedling works wonders. Skip this, and you’ll risk leggy, weak seedlings that flop over like overcooked spaghetti.
Why did my traveler palm seed turn moldy?
Mold = too much moisture. If your seed or soil looks fuzzy or smells funky, reduce watering and improve airflow. Let the top inch of soil dry out between waterings, and avoid sealing the pot in plastic. If mold strikes, repot the seed in fresh, sterile soil and trim any affected areas with sterilized scissors.
What’s the best alternative if my seed won’t sprout?
No worries—try air-layering or buying a small traveler palm pup (baby plant) from a nursery. Air-layering involves wrapping a healthy stem in damp moss and plastic to root it while still attached to the parent plant. It’s a foolproof backup for impatient gardeners (or seed failures)!
Wrapping up and next steps
Growing traveler palm seeds is a rewarding journey that brings a touch of the tropics to your home—one tiny seed at a time! 🌱 With the right patience and care, you’ll soon witness lush, vibrant fronds emerging, proving that nature’s magic is just a few steps away. Ready to turn your green thumb into a tropical oasis? Start by gathering your supplies, follow the simple propagation steps, and watch your seedling thrive. Now’s the perfect time to plant that seed—your future palm awaits!