
Flowers
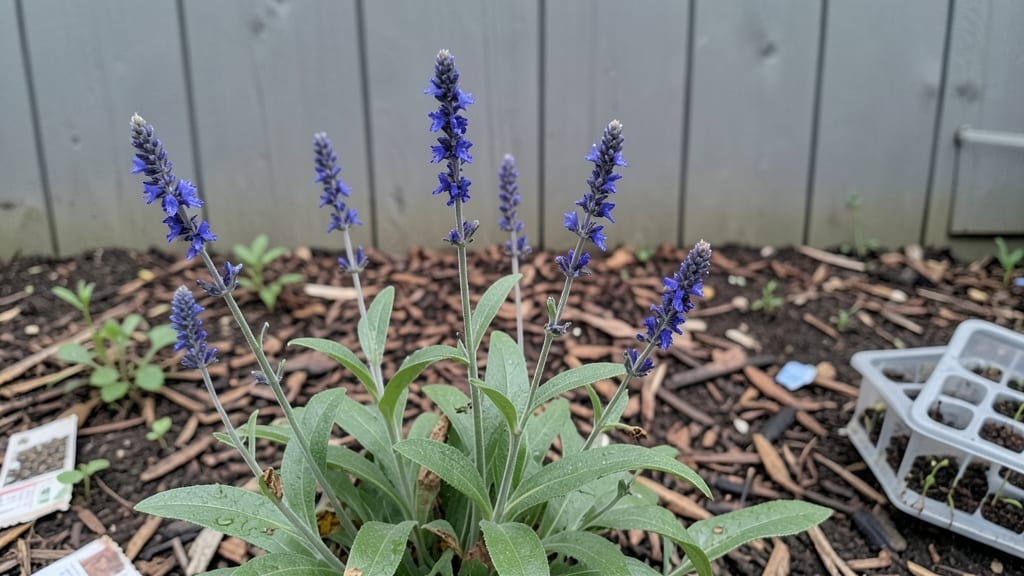
Growing veronica flower seeds transforms a patch of soil into a vibrant cascade of blue spires by summer. 🌿 I’ve watched these delicate blooms turn my garden into a pollinator magnet—all from seeds that cost pennies and take just eight weeks to reward you with color.
The trick is patience and a few simple steps that even a beginner can nail.
You’ll need well-draining soil, a sunny spot with at least six hours of light, and a flat tray for starting seeds indoors. Veronica seeds germinate quickly—usually within 10-14 days—but they’re tiny, so don’t be surprised if they look like dust when you plant them.
A light misting of water keeps them happy until those first green shoots appear.
By week six, you’ll be pinching back leggy seedlings to encourage bushier growth, and by week eight, those signature blue flower spikes will start shooting up. The blooms attract bees and butterflies while adding a soft, airy texture to borders or containers. Just watch for slugs—they love young veronica plants.
Works in zones 3-9, thrives in poor soil, and self-seeds reliably. Here’s how to turn those tiny seeds into a garden showstopper without losing your patience along the way.
📚 In This Guide
- What you need
- Instructions
- Tips and common mistakes
- Wrapping up and next steps
What you need
- ● Veronica flower seeds: 1 packet (contains ~50-100 seeds, depending on variety). Choose a type like Veronica longifolia (spike speedwell) or Veronica incana (woolly speedwell) for best results.
- ● Seed-starting trays or biodegradable pots: 1 tray (with individual cells) or 6-12 small pots (2-3 inches deep).
- ● Seed-starting mix: 1 bag (sterilized, well-draining mix designed for seeds). Avoid garden soil—it’s too dense!
- ● Grow lights or sunny windowsill: A full-spectrum LED grow light (12-16 hours/day) or a south-facing window with direct sunlight.
- ● Misting bottle or spray nozzle: For gentle watering without disturbing seeds.
- ○ Plastic wrap or humidity dome: To retain moisture while seeds germinate (optional but helpful for beginners).
- ● Small hand trowel or spoon: For planting seeds (1-2 inches deep).
- ● Labels and markers: To track seed varieties and planting dates.
- ○ Fertilizer (optional but recommended): Balanced liquid fertilizer (e.g., 10-10-10) for seedlings.
- ● Slow-release granular fertilizer (e.g., 5-10-5) for transplanting.
- ● Outdoor space or larger pots: After 4-6 weeks, seedlings will need 6+ inches of space. Use garden beds or 6-inch pots.
- ● Pruning shears: For trimming leggy seedlings or deadheading spent blooms later.
- ● Temperature: Seeds germinate best at 60–70°F (15–21°C). Use a heat mat if your home runs cooler.
- ● Humidity: Keep soil consistently moist but not soggy. A humidity tray (with pebbles and water) helps!
- ● Light: Seedlings need 12–16 hours of light daily. Supplement with grow lights if natural light is insufficient.
Step-by-step instructions for growing veronica flowers from seed
Here's my foolproof method for growing vibrant veronica blooms—perfect for borders or containers.
🌱 Step 1: Prepare Seed Trays and Mix
Fill your seed trays with the 3 gallons of seed-starting mix you’ve prepared, spreading it evenly across the cells. I press down lightly with my fingers to remove air pockets—this helps the tiny seeds make good contact with the soil. The mix should feel like a damp sponge, not soggy or dry.
For veronica seeds, I use 4-inch square trays (they’re shallow enough to prevent overwatering). Sprinkle the 1 packet of veronica seeds evenly across the surface—don’t crowd them! A light dusting over the seeds with a pinch more of the mix keeps them in place. Here’s the thing: veronica seeds are tiny, so I tap the tray gently to settle them without burying them too deep.
💧 Step 2: Moisten and Cover for Germination
Mist the tray with warm water until the soil looks evenly damp but not wet. I use a spray bottle for this—it’s gentle and won’t dislodge the seeds. Place the tray in a plastic bag (or cover it with plastic wrap) to create a mini greenhouse. This keeps humidity high, which veronica seeds love for germination.
Store the tray in a warm spot (around 70-75°F). A sunny windowsill works, but I’ve found that a seedling heat mat speeds things up. You’ll see sprouts in 7-14 days—watch for the first green tips pushing through the soil. Once they appear, remove the cover immediately to prevent mold. Real talk: if you skip this step, you might lose seedlings to damping-off.
☀️ Step 3: Provide Light and Thin Seedlings
Move the tray to a bright, indirect light spot as soon as sprouts emerge. Veronica seedlings need 12-14 hours of light daily, so a south-facing window or a grow light works best. I keep my grow light 4 inches above the seedlings and raise it as they grow to avoid leggy stems.
When seedlings have 2-3 true leaves (not the first tiny seed leaves), it’s time to thin. Use small scissors to snip the weaker seedlings at soil level—this prevents overcrowding. Keep the strongest seedling in each cell, spacing them about 1 inch apart. You’ll have 4-6 healthy seedlings ready for transplanting in no time.
🪴 Step 4: Harden Off and Transplant
Two weeks before your last frost date, start hardening off the seedlings. Place them outside in a shaded, sheltered spot for 1-2 hours the first day, gradually increasing time over 7-10 days. This toughens them up for the garden. On the last day, leave them out all day if temperatures stay above 50°F. Veronica thrives in full sun to partial shade, so choose a spot with at least 4-6 hours of sunlight.
Dig small holes in the garden bed, spacing them 12-18 inches apart (veronica spreads, so give them room). Gently remove each seedling from its tray, keeping the root ball intact, and place it in the hole. Fill in with soil, firm lightly, and water deeply. I add a 1-inch layer of mulch around each plant to retain moisture and suppress weeds.
✂️ Step 5: Maintain and Enjoy the Blooms
Water veronica 1-2 times per week, keeping the soil evenly moist but not soggy. You’ll know it’s right when the top inch of soil feels dry to the touch. Deadhead spent blooms by pinching off faded flowers—this encourages continuous blooming from early summer through fall. Veronica is drought-tolerant once established, but consistent watering in the first few weeks helps roots grow strong.
Fertilize lightly every 4-6 weeks with a balanced, water-soluble fertilizer (like the 1 bottle of 10-10-10 you’ve got). Stop fertilizing in late summer to let the plants focus on preparing for winter. With proper care, your veronica will reward you with vibrant blue, purple, or pink blooms all season long!
Tips & tricks for perfect veronica flower seedlings
Veronica seeds are tiny but mighty—here’s how to give them the best start for those stunning blooms.
The Soil Secret: When filling your 4-inch trays with the 3 gallons of seed-starting mix, press down gently to remove air pockets. This ensures the tiny veronica seeds make solid contact with the soil. I like to use a small spoon to create shallow dimples in the soil surface—this helps those microscopic seeds find their way down without being buried too deep. Think of it as creating little seed cradles!
Germination Game-Changer: The 70-75°F warm spot for germination is non-negotiable, but here’s my extra tip: place a small bowl of warm water near the tray. The extra humidity helps maintain that critical moisture level without overwatering. Once you see those first green tips (usually within 7-14 days), remove the cover immediately—even a day too long can lead to mold. I’ve lost seedlings to damping-off twice because I forgot this step!
Lighting Upgrade: While 12-14 hours of light is ideal, I’ve found veronica seedlings actually thrive with 16 hours of light during their early growth phase. If you’re using a grow light, position it just 3 inches above the seedlings for the first week, then gradually raise it as they grow. This prevents leggy stems while giving them the light they crave. Watch for leaves touching the light—if they do, it’s time to raise it up!
Transplanting Wisdom: When hardening off your seedlings, start with just 1-2 hours in shade on day one, then increase by 1 hour each day. I’ve seen many gardeners rush this process and end up with wilted seedlings. Also, when transplanting, make sure to water deeply before removing them from the trays—this helps minimize transplant shock. The 12-18 inch spacing gives them room to spread, but don’t be afraid to plant them closer if you’re using veronica as a border plant.
Pro Tips for Veronica Flower Seeds
- Veronica seeds are tiny but mighty—here’s how to give them the best start for those stunning blooms.
- The Soil Secret: When filling your 4-inch trays with the 3 gallons of seed-starting mix, press down gently to remove air pockets.
- Germination Game-Changer: The 70-75°F warm spot for germination is non-negotiable, but here’s my extra tip: place a small bowl of warm water near the tray.
Frequently asked questions
Got questions about growing veronica flower seeds? You’re not alone! Here are answers to the most common queries to help you grow vibrant blooms with confidence.
How long does it take for veronica flower seeds to germinate?
Most veronica seeds sprout within 10–21 days when kept in warm (65–75°F), moist soil. For faster results, pre-soak seeds for 12–24 hours or use a heat mat. Patience is key—some varieties (like Veronica spicata) may take longer. Keep soil consistently damp but not soggy to avoid damping-off.
Can I plant veronica seeds directly outdoors, or should I start indoors?
Direct sowing works for hardy annuals (like Veronica incana) in spring after frost risk passes. For tender perennials (e.g., Veronica longifolia), start seeds 6–8 weeks indoors (60–70°F) for stronger seedlings. Use biodegradable pots to avoid transplant shock when moving outdoors.
Why aren’t my veronica seeds sprouting? Troubleshooting tips.
Check these common issues:
- Cold soil: Seeds need warmth to germinate. Use a seedling heat mat or wait until nighttime temps stay above 50°F.
- Too deep: Plant seeds only 1/8" below soil—veronica seeds need light to sprout.
- Old seeds: Store-bought seeds lose viability after 1–2 years. Test viability by soaking a few in water (floaters = dead).
- Poor drainage: Overly wet soil causes rot. Use a mix of 50% potting soil + 50% perlite.
If still stuck, try a bottom-watering tray to keep moisture even.
What’s the best companion plant for veronica flowers?
Veronica thrives alongside low-growing perennials like thyme, lavender, or coreopsis. Avoid planting near monarda (bee balm) or salvia, which can compete for nutrients. For pollinator gardens, pair with echinacea or rudbeckia—their contrasting heights create a stunning visual while supporting shared visitors like bees and butterflies.
Can I save veronica seeds from my garden for next year?
Yes! Let 10–15% of blooms fade naturally on the plant to form seed pods (they’ll turn brown and papery). Harvest when pods dry but before they split open, then store seeds in a cool, dry place (paper envelope works). Most veronica seeds remain viable for 1–2 years. Pro tip: Label seeds by variety to avoid surprises!
Wrapping up and next steps
Growing veronica flower seeds is a rewarding journey that brings vibrant blooms to your garden in just 8 weeks! With the right soil, sunlight, and care, you’ll enjoy a burst of color and nature’s beauty.
Whether you’re a beginner or a seasoned gardener, these hardy flowers are a fantastic choice for adding charm to any space.
Now that you’re armed with tips and answers, why not take the next step? Grab your seeds, prepare your garden bed, and watch your little plants transform into a stunning display. Happy gardening—your future blooms are waiting! 🌸✨