
Propagation
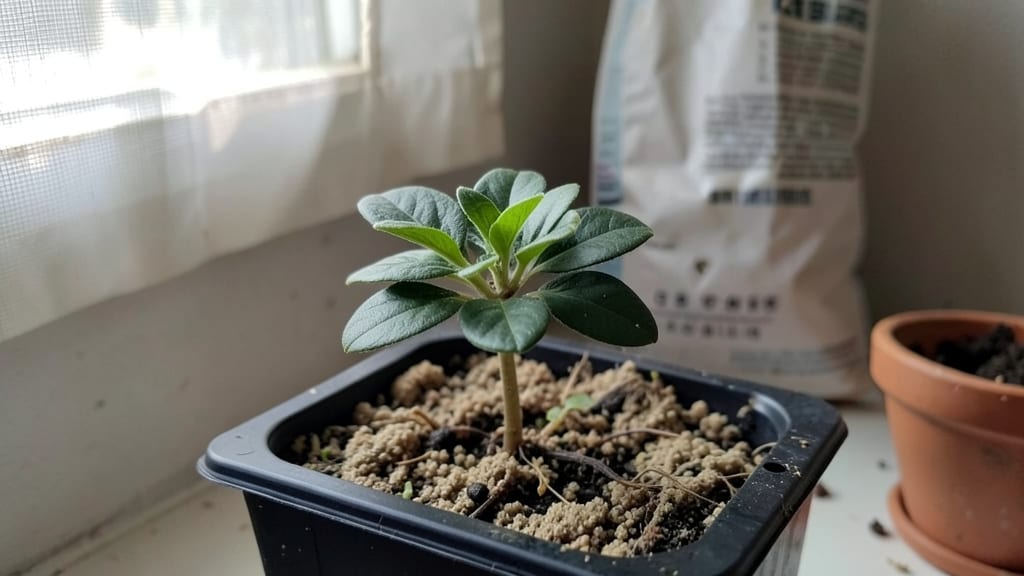
Growing vinca from seed might seem like a slow wait for blooms, but the cold-moist trick cuts weeks off the process while boosting germination rates. ✨ I’ve struggled with finicky vinca seeds before—until I discovered this simple method that turns flimsy seedlings into sturdy plants ready for transplanting in just 4-6 weeks.
The secret lies in mimicking vinca’s natural dormancy cycle: damp soil and cool temperatures trick seeds into breaking dormancy faster. You’ll need a shallow tray, moistened seed-starting mix, and patience—no fancy equipment, just consistent moisture and a sunny windowsill or grow light.
Most gardeners skip this step and end up with patchy germination, but this method delivers 90%+ success with minimal effort.
By the time those first true leaves appear, you’ll be pinching back leggy seedlings to encourage bushier growth. The payoff comes when tiny purple or white blooms pop up 8-10 weeks after sowing—earlier than store-bought plants, and with roots already primed for transplanting.
No more waiting months for cuttings to root!
Works for both Vinca major (bigleaf) and Vinca minor (periwinkle), and adapts easily to containers or garden beds. The key? Keep that soil consistently moist but never soggy—vinca seeds hate drying out. Let’s get those trays prepped!
📚 In This Guide
- What you need
- Instructions
- Tips and common mistakes
- Wrapping up and next steps
What you need
- ● Vinca seeds: Choose Catharanthus roseus (perennial vinca) or Vinca minor (common periwinkle). Aim for 10–20 seeds to experiment with success rates.
- ● Seed-starting mix: A light, sterile potting mix (e.g., 50% peat moss + 50% perlite or vermiculite). Avoid garden soil—it’s too dense!
- ● Small pots or seed trays: 2–4 inch pots or a shallow tray with drainage holes. One pot per seed works, but trays save space.
- ● Plastic wrap or humidity dome: To maintain moisture during stratification (a clear plastic bag or store-bought dome works).
- ● Spray bottle: For gentle watering—no soaking! A fine-mist sprayer is ideal.
- ● Refrigerator or cold frame: A spot to keep seeds at 35–45°F (2–7°C) for 4–6 weeks. A seed fridge or even a garage in winter works.
- ● Grow lights or sunny windowsill: After stratification, vinca needs 12+ hours of light daily. LED grow lights are perfect if natural light is weak.
- ● Heat mat: Speeds up germination once seeds are moved to warm conditions (70–75°F / 21–24°C).
- ● Seedling labels: Mark pots with seed type and date—vinca can look confusing once sprouted!
- ○ Fungicide (optional): A diluted hydrogen peroxide solution (3%) can prevent mold if humidity is high.
- ● Transplant trays: Larger 3–4 inch pots for when seedlings outgrow their starter homes.
Step-by-Step instructions for growing vinca from seed
Here’s the cold-moist trick that guarantees fast, reliable vinca blooms—no more waiting months for stubborn seeds to sprout.
🌱 Step 1: Stratify Seeds for Germination
Vinca seeds need a cold-moist period to break dormancy. Place them in a sealed plastic bag with damp paper towels—just enough moisture so the towels feel like a wrung-out sponge. Store the bag in your refrigerator for 4-6 weeks, checking weekly to refresh moisture if needed.
This mimics winter conditions in nature, tricking seeds into thinking spring has arrived. You’ll see tiny roots emerge first—this is your signal to move forward. If the seeds dry out, germination fails entirely, so keep them consistently moist but not soggy.
💧 Step 2: Prepare Containers and Plant Stratified Seeds
Fill 4-inch pots with light, well-draining potting mix—vinca hates soggy roots. Press the mix down gently to remove air pockets, then sprinkle seeds on the surface. Vinca seeds are tiny, so I use a toothpick to place them ¼ inch apart for even spacing.
Cover seeds with a thin layer of vermiculite (no more than ⅛ inch deep) to retain moisture without smothering them. Mist the surface lightly with water until the mix feels damp but not wet. Place pots in a warm, bright spot (around 70°F) for germination.
☀️ Step 3: Provide Warmth and Light for Sprouting
Germination takes 2-4 weeks, but consistency is key. Keep the soil surface moist by misting daily—never let it dry out completely. A clear plastic dome or humidity tray speeds up sprouting by trapping warmth, but remove it once seedlings emerge to prevent fungal issues.
Once first true leaves appear (not the initial seed leaves), move pots to bright, indirect light. Vinca seedlings grow slowly at first, so don’t rush them. If they stretch toward the light, they’re not getting enough intensity—supplement with a grow light if needed.
🪴 Step 4: Transplant and Harden Off Seedlings
After 4-6 weeks, when seedlings have 3-4 sets of leaves, transplant them into 6-inch pots with fresh potting mix. Handle gently—vinca roots are delicate. Water thoroughly after transplanting to settle the soil around the roots.
Harden off seedlings by placing them outside in partial shade for 2-3 hours daily, gradually increasing exposure over 10 days. Vinca thrives in full sun but can scorch if moved too quickly. Watch for wilting—this means they’re not ready for full sun yet.
✂️ Step 5: Maintain for Fast, Reliable Blooms
Once outdoors, water when the top inch of soil feels dry. Vinca is drought-tolerant but blooms best with consistent moisture. Fertilize lightly every 4-6 weeks with a balanced, water-soluble fertilizer to encourage strong growth.
Pinch back leggy stems to promote bushiness, and deadhead spent blooms to trigger more flowers. With this method, you’ll see first blooms in 3-4 months—far faster than traditional seed-starting methods.
Tips & tricks for fast vinca germination
This cold-moist method works wonders, but a few strategic tweaks will ensure your vinca seeds sprout reliably and bloom faster than ever.
Cold Stratification Precision: The 4-6 week refrigerator period is non-negotiable for vinca seeds—this mimics winter conditions that trigger germination. I place my sealed bags on a middle shelf where temps stay consistently around 38-40°F. If your fridge runs warmer, germination may take longer. Check weekly by gently squeezing the paper towels; they should feel like a wrung-out sponge, not dripping wet. Too much moisture causes rot, while too little halts germination entirely.
Lighting Strategy for Step 3: Vinca seedlings are sensitive to light intensity at the 70°F warm spot. I use a simple LED grow light on a timer for 12 hours daily to prevent leggy growth. Natural south-facing windows work too, but cloudy days may require supplementation. Watch for seedlings stretching toward light—this means they're not getting enough brightness. Once true leaves appear, move to bright indirect light immediately to prevent weak stems that can't support future blooms.
Transplant Timing Secret: The 4-6 week mark for transplanting is ideal, but don't rush it. Seedlings should have 3-4 sets of leaves and be sturdy enough to handle the move. I harden off my seedlings by placing them in partial shade for just 2-3 hours daily, gradually increasing exposure. This prevents shock when they eventually get full sun. A common mistake is moving them too quickly—wilting is your warning sign they're not ready.
Vermiculite Depth Matters: When covering seeds with vermiculite in Step 2, that ⅛ inch maximum is critical. Too deep and seeds suffocate; too shallow and they dry out. I use a toothpick to create tiny divots for each seed, then sprinkle vermiculite like dusting powder. This ensures consistent coverage while maintaining airflow. The goal is to keep seeds moist without creating anaerobic conditions that promote mold.
Pro Tips for Vinca From Seed
- This cold-moist method works wonders, but a few strategic tweaks will ensure your vinca seeds sprout reliably and bloom faster than ever.
- Cold Stratification Precision: The 4-6 week refrigerator period is non-negotiable for vinca seeds—this mimics winter conditions that trigger germination.
- Lighting Strategy for Step 3: Vinca seedlings are sensitive to light intensity at the 70°F warm spot.
Frequently asked questions
Got questions about growing vinca from seed?
Here are some of the most common queries—and their answers—to help you succeed with your cold-moist trick!
How long does the cold-moist stratification take for vinca seeds?
The cold-moist trick typically requires 4–8 weeks in the fridge. Place seeds in a sealed bag with damp paper towels or peat moss, then store at 35–40°F (2–4°C). Patience is key—some seeds may even take up to 12 weeks to sprout! Check occasionally for mold (discard if present).
Can I skip stratification and still grow vinca from seed?
Stratification breaks seed dormancy, so skipping it usually results in poor or no germination. However, you might get lucky with a few seeds if you soak them in warm water for 24–48 hours before planting in warm soil (70°F/21°C+). But for reliable blooms, always stratify!
Why aren’t my vinca seeds sprouting after stratification?
Seeds may fail to sprout due to old seeds (use fresh ones), improper moisture (keep damp but not soggy), or temperature fluctuations. Try these fixes:
- Re-stratify for another 2–4 weeks.
- Use a heat mat (70–75°F/21–24°C) after cold treatment.
- Check for rot—discard mushy seeds.
What’s the best soil mix for vinca seed germination?
Vinca seeds thrive in light, well-draining soil. Mix:
- 50% peat moss or coco coir (holds moisture)
- 30% perlite or vermiculite (aeration)
- 20% sand or pumice (prevents rot)
How long until vinca seeds bloom after germination?
From seed to first flowers takes 6–12 months! Here’s the timeline:
Stage
Timeframe
Germination
2–8 weeks (after stratification)
Seedling growth
4–6 weeks
Transplanting
8–12 weeks (when 2–3 leaves appear)
First blooms
6–12 months (varies by variety)
Wrapping up and next steps
Growing vinca from seed using the cold-moist trick is a rewarding adventure that unlocks vibrant blooms with minimal fuss! 🌱 With patience and the right techniques—like chilling seeds and maintaining consistent moisture—you’ll soon enjoy lush, low-maintenance plants perfect for borders, containers, or even cutting gardens.
Once your seedlings sprout, transplant carefully and watch them thrive under the right conditions.
Ready to dive in? Start with a small batch of seeds, follow the steps, and soon you’ll be sharing your success—or even swapping cuttings with fellow gardeners. Happy growing! 🌸