
Propagation
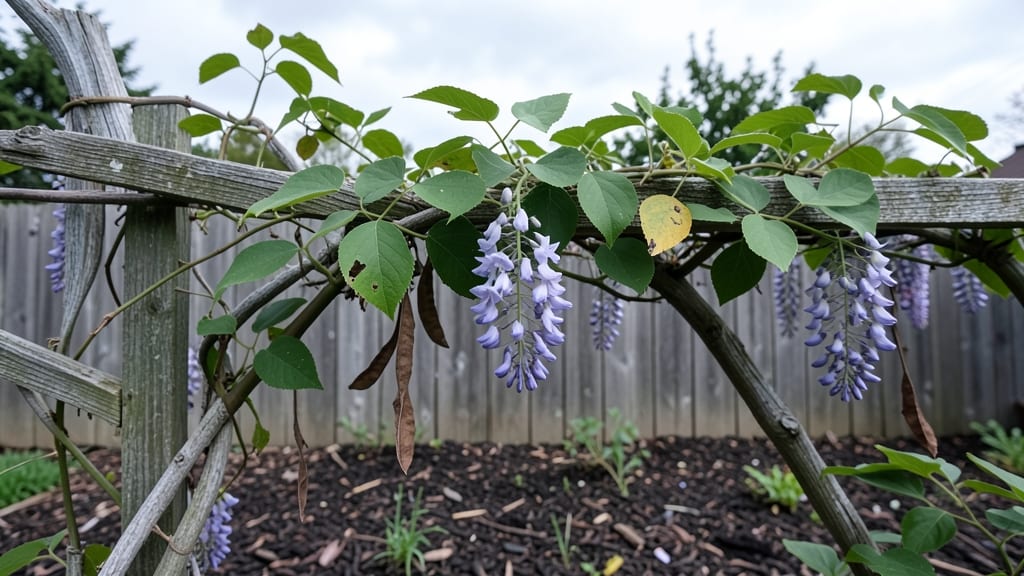
Growing Wisteria frutescens from seeds using the layered chill method produces reliable blooms that outperform store-bought plants. I’ve struggled with slow germination before, but this technique—mimicking natural winter stratification—boosts success rates dramatically.
The key lies in patience and precise timing, especially when dealing with seeds that need a cold period to break dormancy.
You’ll need fresh seeds, a damp paper towel, a sealed plastic bag, and a refrigerator for the 4-6 week chill. Start indoors in early fall, then plant after the last frost when soil reaches 60°F.
The layered approach ensures seeds wake up just as spring arrives, ready to establish roots before summer heat sets in.
By late spring, you’ll see deep green tendrils climbing and thriving, though blooms may take 3-5 years to appear. This method works best for Wisteria frutescens because it skips the unpredictability of cuttings while preserving the plant’s natural vigor.
Early care focuses on consistent moisture and support structures to guide those vigorous vines.
Common challenges include mold during stratification or leggy seedlings—both fixable with proper airflow and light. For best results, pair this method with a trellis or sturdy fence. Once established, these vines reward you with fragrant purple blooms for decades, proving the wait is worth it.
📚 In This Guide
- What you need
- Instructions
- Tips and common mistakes
- Wrapping up and next steps
What you need
- ● Wisteria frutescens seeds: 5–10 fresh, viable seeds (harvested from fully mature pods). Pro tip: Store seeds in a cool, dry place until use!
- ● Well-draining potting mix: 2–3 cups of a blend designed for seed-starting (e.g., 50% peat moss, 30% perlite, 20% vermiculite). 💡 Avoid garden soil—it’s too dense!
- ● Small seed trays or pots: 2–4 shallow containers (3–4 inches deep) with drainage holes. ✨ Clear plastic or biodegradable options work great!
- ● Plastic wrap or humidity dome: To maintain moisture during germination.
- ● Spray bottle: For gentle watering (avoid over-saturating seeds!).
- ● Refrigerator (or cold frame):g For the chill stratification step (set to 35–40°F / 2–4°C).
- ● Grow lights or sunny windowsill: A south-facing window or LED grow lights (12–16 hours/day) for post-chill growth.
- ● Seed scarification tools: Sandpaper (120–200 grit) or a knife to nick seed coats if germination is slow.
- ● Heating mat: For faster germination (70–75°F / 21–24°C).
- ● Fertilizer: A balanced, water-soluble fertilizer (5-5-5 NPK) diluted to half-strength for seedlings.
- ● Plant labels: To track seed varieties and planting dates.
- ● Transplanting pots: 4–6 inch pots with fresh potting mix for seedlings once they sprout.
Instructions for stratifying Wisteria frutescens seeds using the layered chill method
This proven approach breaks seed dormancy reliably, ensuring strong germination and vigorous blooms.
Collect and Prepare the Seeds
Harvest mature wisteria seed pods in late fall when they turn brown and begin to split open naturally. Extract the seeds carefully, ensuring they remain intact—damaged seeds will not germinate. Store them in a paper towel-lined container to prevent moisture buildup, and keep them in a cool, dry place at 50-60°F until you begin stratification.
Wisteria seeds have a hard outer coating that requires scarification to soften. Place the seeds between two layers of coarse sandpaper (120-150 grit) and gently rub them until the outer shell appears slightly roughened but not cracked. This process mimics natural weathering and improves water absorption. Handle seeds individually to avoid over-scarification, which can damage the embryo inside.
Layer the Seeds for Cold Stratification
Fill a quart-sized plastic container with a 1:1 mix of moistened perlite and coarse sand—this combination ensures proper aeration while retaining moisture. The perlite should feel damp but not soggy when squeezed; excess water will lead to rotting. Arrange the scarified seeds in a single layer, spacing them 1 inch apart to prevent crowding during stratification.
Cover the seeds with an additional 1 inch of the perlite-sand mix, then seal the container with plastic wrap or a lid. Poke small holes in the lid to allow for minimal airflow—this prevents condensation buildup while maintaining humidity. Place the container in a refrigerator set to 35-40°F, where it will remain for 8-12 weeks. Check the mix every 2-3 weeks to ensure it stays evenly moist; adjust moisture levels by adding a few drops of water if the top layer feels dry.
Monitor for Germination and Prepare for Planting
After 8-12 weeks, remove the container from cold storage and place it in a warm, bright location (around 65-70°F) to encourage germination. Germination typically occurs within 2-4 weeks, though some seeds may take longer. You’ll notice the first signs when the seed coat splits and a small root emerges—this is your cue to act quickly.
Once the radicle (primary root) reaches ½ inch in length, carefully transplant each seed into its own 4-inch biodegradable pot filled with a sterile seed-starting mix. Press the soil lightly around the seed to secure it without burying it deeply. Keep the pots in a humid propagation tray or under a plastic dome to maintain high humidity, and place them under grow lights for 12-14 hours daily to prevent leggy growth. Water gently from the bottom to avoid disturbing the delicate roots.
Harden Off and Transplant Young Seedlings
After 4-6 weeks of growth, when seedlings develop 2-3 sets of true leaves, begin hardening them off. Move the pots outdoors to a sheltered, shaded area for 1-2 hours daily, gradually increasing exposure over 10-14 days. This acclimation period is critical—skipping it results in transplant shock, where seedlings wilt or fail to establish roots.
Choose a sunny, well-draining location for transplanting, ideally in early spring after the last frost date. Dig a hole twice as wide as the root ball but no deeper, and amend the soil with compost to improve fertility. Water the hole thoroughly before placing the seedling in, then backfill with soil and firm gently. Mulch the base with 2 inches of organic mulch to retain moisture and suppress weeds. Water deeply immediately after transplanting to help roots settle into the new soil.
Tips & tricks for perfect Wisteria frutescens seed stratification
Mastering the layered chill method for wisteria seeds transforms a notoriously difficult germination process into a reliable one—here's how to optimize each step for success.
The Scarification Technique: When rubbing seeds between sandpaper, focus on a gentle, even pressure rather than aggressive scrubbing. The goal is to roughen the seed coat just enough to create microscopic cracks—think of it as creating tiny windows for water to enter. Test a few seeds by pressing your thumbnail: the shell should yield slightly but not split open. Over-scarification can compromise the embryo inside, reducing germination rates.
Moisture Balance in Stratification: The 1:1 perlite-sand mix should maintain consistent moisture without becoming soggy. To test, squeeze a handful: water should lightly dampen your fingers without dripping. During the 8-12 week stratification period at 35-40°F, condensation can build up inside the container. The small holes in the lid serve a critical purpose—allowing just enough airflow to prevent mold while maintaining humidity. If you notice condensation droplets forming on the lid, open the container for 10 minutes to air it out.
Germination Timing and Transplant Readiness: The 2-4 week germination window after removing seeds from cold storage can feel like an eternity, but patience is key. Once the radicle reaches ½ inch, act quickly—delaying transplantation beyond this stage risks root damage. For optimal growth, maintain the 12-14 hours of grow light daily, positioning lights 2-3 inches above the seedlings. This prevents leggy growth while providing sufficient light intensity for photosynthesis.
Harden Off Gradually: The 10-14 day hardening process is where many gardeners rush the process. Begin with just 1-2 hours of shade exposure, then incrementally increase time and sunlight. A good rule of thumb is to extend outdoor time by no more than 30 minutes each day. Watch for signs of stress like wilting or yellowing leaves—these indicate the plant isn't acclimating properly. If you notice these symptoms, return the seedlings to their sheltered location for an additional day before attempting more exposure.
Pro Tips for Wisteria Frutescens Seeds
- Mastering the layered chill method for wisteria seeds transforms a notoriously difficult germination process into a reliable one—here's how to optimize each step for success.
- The Scarification Technique: When rubbing seeds between sandpaper, focus on a gentle, even pressure rather than aggressive scrubbing.
- Moisture Balance in Stratification: The 1:1 perlite-sand mix should maintain consistent moisture without becoming soggy.
Frequently asked questions
Got questions about growing Wisteria frutescens from seeds? You’re not alone—this method takes patience and precision! Here are answers to the most common queries to help you succeed.
How long does it take for Wisteria frutescens seeds to germinate?
The layered chill method typically yields germination in 4–12 weeks, depending on seed freshness and moisture levels. Some seeds may take longer, so stay patient! Stratify seeds for 60–90 days in the fridge before planting for best results.
Can I skip the cold stratification step?
Not recommended! Wisteria seeds have a hard seed coat and require cold treatment to break dormancy. Skipping stratification may result in 0% germination. If you’re short on time, try soaking seeds in warm water for 24 hours first, but cold stratification remains the gold standard.
What’s the best soil mix for sowing these seeds?
Use a well-draining, sterile mix of 50% peat moss or coconut coir and 50% perlite or sand. Avoid heavy clay soils—Wisteria roots need aeration to thrive. A pH of 6.0–7.0 is ideal. Pro tip: Add a thin layer of vermiculite on top to retain moisture without suffocating seeds.
Why aren’t my seeds sprouting after stratification?
Check these common issues:
- Old seeds: Wisteria viability drops after 1–2 years.
- Improper moisture: Keep soil consistently damp (not soggy).
- Temperature swings: Maintain 65–75°F during germination.
- Depth: Plant seeds ¼ inch deep—too deep delays sprouting.
How do I transplant seedlings without killing them?
Wait until seedlings have 2–3 true leaves and are 3–4 inches tall. Use a small trowel to lift gently, keeping the root ball intact. Harden off seedlings for 1 week by gradually exposing them to outdoor conditions before permanent planting. Mulch heavily to protect roots in their first year.
Wrapping up and next steps
Growing Wisteria frutescens from seeds using the layered chill method is a rewarding journey that unlocks vibrant blooms and lush foliage. By following the right steps—from seed collection to stratification and planting—you’ll set your wisteria up for success. Don’t let patience deter you; consistency is key! 🌱
Ready to nurture your own? Start with just a few seeds and experiment with timing—soon, you’ll be rewarded with fragrant, cascading flowers. Happy gardening!