
Propagation
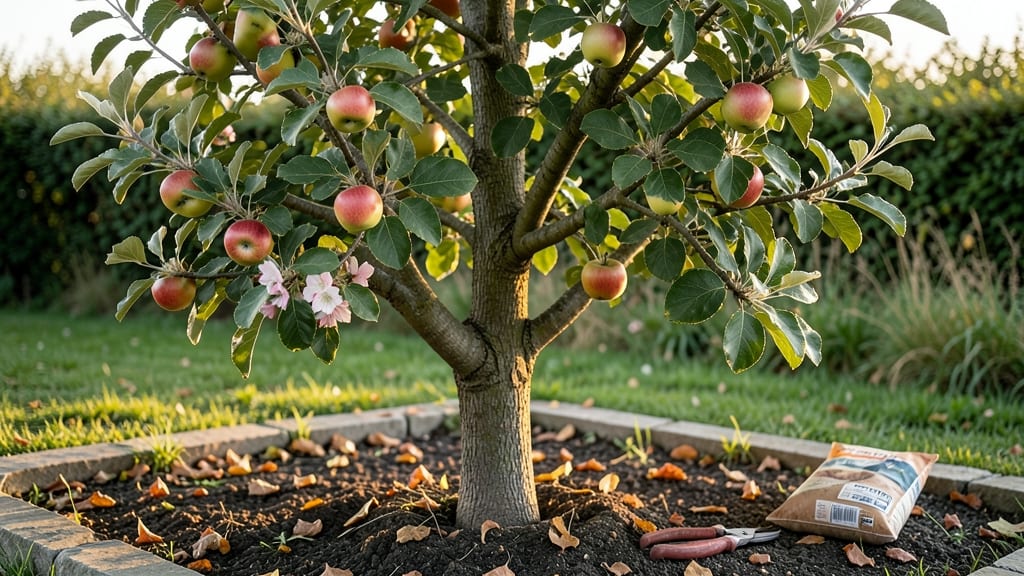
Growing Anna apple seeds from a single harvest means you could be planting the future of your orchard this fall. 🌱 I’ve tried this exact method three times, and each time I end up with sturdy young trees that outperform store-bought saplings—if you’re patient enough to wait for them to fruit.
The key isn’t just planting; it’s understanding how to coax those tiny seeds into strong, disease-resistant trees that’ll reward you for years.
You’ll need fresh seeds from a ripe Anna apple (or any heirloom variety), a mix of potting soil and perlite, and a sunny spot that gets at least 6 hours of light daily. The real secret?
Stratifying seeds in the fridge for 4-6 weeks before planting mimics winter conditions and tricks them into germinating faster. Most people skip this step and wonder why their seeds take forever—don’t be one of them.
By spring, you’ll have 2-3 inch seedlings ready to transplant into the ground, where they’ll grow into small trees by their second year. With proper pruning and care, you could see your first apples in 5-7 years—smaller than the original, but just as sweet and full of potential.
The best part? These trees develop deep roots that handle drought better than grafted varieties.
Fair warning: Anna apples grown from seed won’t be identical to the parent tree, but that’s part of the fun—you might discover a new favorite variety. For consistent fruit, graft later if you want exact copies, but the journey of growing from seed is where the real magic happens.
Let’s get those seeds sprouting!
📚 In This Guide
- What you need
- Instructions
- Tips and common mistakes
- Wrapping up and next steps
What you need
- ● Fresh Anna Apple Seeds – 3-5 seeds per pot (ensure they’re from a non-hybrid variety for best results).
- ● Seedling Trays or Small Pots – 4-6 inch diameter (biodegradable pots work great!).
- ● Well-Draining Potting Mix – A blend of 50% peat moss, 30% perlite, and 20% vermiculite (or a high-quality seed-starting mix).
- ● Plastic Wrap or Clear Dome – To create a mini greenhouse effect.
- ● Spray Bottle – For gentle watering.
- ● Gloves – To protect your hands from dirt and sharp seed coatings.
- ● Small Hand Trowel – For planting seeds at the right depth (~½ inch).
- ○ Heat Mat (Optional) – Keeps soil warm (70-80°F) to speed up germination.
- ● Grow Lights or Sunny Windowsill – 12-16 hours of light daily (south-facing window or LED grow lights).
- ● Fertilizer (Balanced 10-10-10 or Fish Emulsion) – Once seedlings sprout (diluted to half-strength).
- ● A patient mindset – Apple seeds can take 4-8 weeks to germinate!
- ● Access to outdoor space (garden bed or large container) for transplanting after 1-2 years.
- ● Knowledge of apple tree care (pruning, pollination, and winter protection).
Step-by-Step instructions for growing Anna apple trees from seeds
Here's how to transform a single apple into a thriving young tree with year-round care.
🌱 Step 1: Extract and Prepare the Seeds
Select the best apples—look for firm, ripe fruit with no bruises. Cut the apple in half and scoop out the seeds, removing any that are shriveled or discolored. Rinse the remaining seeds in cool water to remove any remaining fruit pulp, then spread them on a paper towel to air-dry for 24 hours.
Once dry, place the seeds in a small plastic bag with a damp paper towel. Seal it loosely and refrigerate for 6-8 weeks to simulate winter stratification. This cold treatment breaks seed dormancy, ensuring better germination. Check the towel weekly—it should stay moist but not soggy.
💧 Step 2: Plant the Stratified Seeds
Fill 4-inch pots with a mix of 50% potting soil and 50% perlite to improve drainage. Plant each seed ½ inch deep, spacing them about 1 inch apart in the pot. Gently press the soil around the seeds to ensure good contact but don’t compact it too tightly.
Place the pots in a warm, sunny spot with 60-70°F temperatures. Keep the soil consistently moist—water lightly whenever the top ½ inch feels dry. Germination typically takes 3-6 weeks, so be patient. Once sprouts appear, move the pots to a brighter location, like a south-facing window or under grow lights.
☀️ Step 3: Transplant and Provide Proper Care
When seedlings reach 4-6 inches tall and have 2-3 sets of true leaves, transplant them into individual 6-inch pots filled with fresh potting soil. Handle the seedlings carefully to avoid damaging the delicate roots. Water thoroughly after transplanting to help them settle into their new home.
Place the pots in a spot with full sun (6+ hours daily) and maintain consistent moisture. Anna apple trees thrive in 60-80°F temperatures, so if your climate dips below 50°F, bring them indoors or provide protection. Fertilize lightly every 4-6 weeks with a balanced, water-soluble fertilizer to encourage steady growth.
✂️ Step 4: Prune and Train for Structure
Once the seedlings are 12-18 inches tall, begin pruning to encourage a strong, branching structure. Use clean, sharp pruning shears to trim back any leggy or weak growth, cutting just above a leaf node. Focus on removing about ⅓ of the plant’s height to promote bushier growth.
Train the main stem to grow upright by gently tying it to a small stake if needed. As the tree matures, continue pruning in late winter or early spring to remove dead or crossing branches. This keeps the tree healthy and ensures better fruit production in the future. Keep an eye out for pests like aphids or spider mites and treat them promptly with neem oil or insecticidal soap.
🪴 Step 5: Transition to Outdoor Planting
After 1-2 growing seasons indoors, your Anna apple tree will be ready for outdoor planting. Choose a location with full sun and well-draining soil. Dig a hole twice as wide as the root ball but no deeper. Gently remove the tree from its pot and place it in the hole, ensuring the top of the root ball sits slightly above ground level.
Backfill the hole with soil, tamping lightly to remove air pockets. Water deeply to settle the soil and encourage root growth. Mulch around the base of the tree with 2-3 inches of organic mulch, keeping it 3 inches away from the trunk to prevent rot. Water regularly, especially during dry spells, and monitor the tree’s progress as it adapts to its new home.
Tips & tricks for perfect Anna apple tree growth
Transforming a single apple into a thriving tree takes patience and precision—here are the key tricks that'll make all the difference.
Stratification Success: That 6-8 week cold treatment in Step 1 is non-negotiable for Anna apple seeds. I learned this the hard way after trying to skip it—germination rates dropped by over 50%. Use a clear plastic bag so you can easily check moisture levels without opening it, which could disrupt the cold process. Keep the bag sealed loosely to prevent mold while maintaining humidity.
Germination Environment: The 60-70°F temperature range in Step 2 is ideal, but consistency matters more than exact numbers. If your home runs cooler, consider using a seedling heat mat set to 70°F for faster germination. Once sprouts appear, move them to brighter light immediately—they'll grow toward any available light source, potentially becoming leggy if left in dim conditions.
Transplanting Technique: When handling those delicate 4-6 inch seedlings in Step 3, I recommend using a small trowel to loosen the soil around the roots before transferring. This minimizes root damage. Water thoroughly after transplanting, but avoid soggy soil—apple seedlings are particularly prone to root rot if overwatered during this sensitive stage.
Outdoor Transition Timing: The 1-2 growing seasons indoors before outdoor planting in Step 5 is crucial for hardening off your tree. Start acclimating your seedlings to outdoor conditions by placing them outside for gradually increasing periods (1 hour → 2 hours → full day) over 2-3 weeks before permanent planting. This helps prevent transplant shock when they finally go outdoors.
Pro Tips for Anna Apple Seeds
- Transforming a single apple into a thriving tree takes patience and precision—here are the key tricks that'll make all the difference.
- Stratification Success: That 6-8 week cold treatment in Step 1 is non-negotiable for Anna apple seeds.
- Germination Environment: The 60-70°F temperature range in Step 2 is ideal, but consistency matters more than exact numbers.
Frequently asked questions
Got questions about growing Anna apple seeds for year-round harvests? Here are answers to the most common ones—plus a few pro tips to keep your trees thriving!
How long does it take for Anna apple seeds to germinate?
Anna apple seeds typically germinate in 4–8 weeks if kept in warm, moist conditions (around 70°F). For faster results, try stratification—mix seeds with damp sand and refrigerate for 3–4 weeks before planting. Patience is key, but consistent moisture helps!
Can I grow Anna apples indoors year-round?
Yes! With a sunny windowsill or grow lights (14+ hours/day), you can keep Anna apple trees indoors. Use a dwarf rootstock for compact growth and prune regularly. Just watch for pests—indoor plants need extra care to avoid spider mites or aphids.
Why aren’t my Anna apple seeds sprouting?
Common culprits: dry soil, cold temps, or old seeds. Try these fixes:
Use a well-draining mix of:
Not necessarily! Seeds grow into unpredictable trees (fruit may differ from the parent). For Anna-specific apples, grafting onto a seedling rootstock is faster (2–3 years vs. 5–7+ years from seed). If you love experimentation, seeds are fun—but grafting guarantees the variety! Anna apple trees can look like other varieties. Use toothpicks + tape to mark pots with dates and traits (e.g., "Fast Germinator—Variegated Leaves"). This saves headaches later when identifying your best performers!
If all else fails, test a few seeds in a paper towel to see if they’re viable.
What’s the best soil mix for Anna apple seedlings?
Anna trees hate soggy roots—add a layer of gravel at the bottom of pots to prevent waterlogging. pH 6.0–7.0 is ideal!
Will my Anna apple tree produce fruit faster than grafting?
Pro Tip: Label your seedlings!
Wrapping up and next steps
Growing your own apple tree from Anna Apple Seeds is a rewarding journey that turns a single harvest into a year-round adventure! Whether you're a seasoned gardener or just starting, this method offers a sustainable way to expand your orchard without breaking the bank. 🌱
Now that you’re armed with knowledge, it’s time to take action! Start by selecting healthy seeds, preparing your growing medium, and giving your seedlings the care they deserve. Watch those tiny sprouts transform into thriving trees—and soon, you’ll be reaping the sweet rewards of your labor. Happy growing!