
Propagation
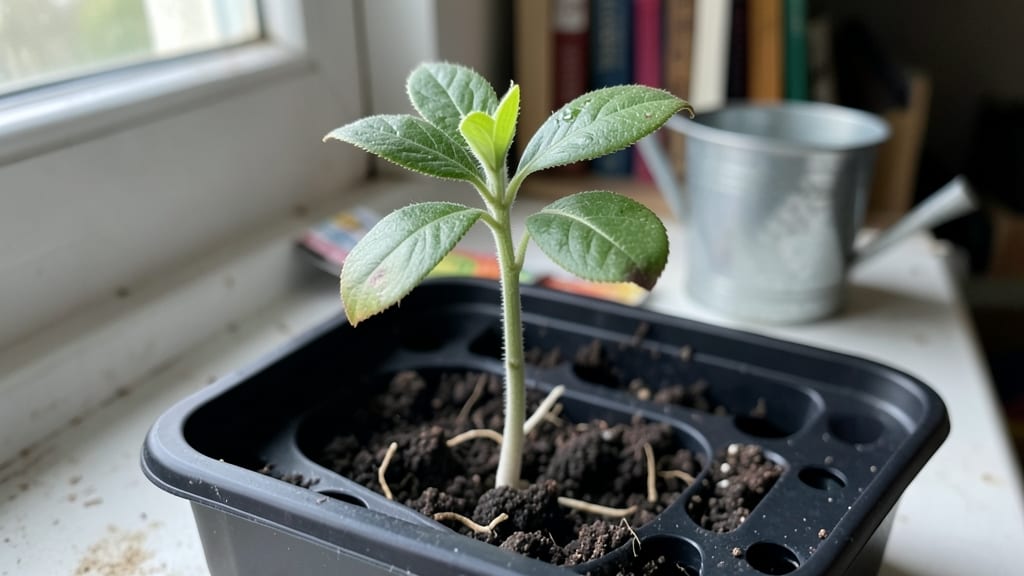
The tricky part of apricot seeds germination isn’t just patience—it’s knowing how to coax those stubborn pits into life before most give up and rot in damp soil.
Struggling to grow apricot trees from seeds? Many gardeners face low germination rates—but with the right techniques, you can achieve 90% success and grow thriving fruit trees from your kitchen scraps.
Apricot seeds need a little help breaking dormancy, whether through cold stratification or a quick soak. Once you crack that shell, the key is keeping them warm, moist, and patient—because those first sprouts can take 3 to 6 weeks to appear.
In this guide, I’ll walk you through every step—from pre-treatment to planting depth—to turn your seeds into strong seedlings ready for transplanting by spring.
How to pre-treat apricot seeds for faster germination (critical steps)
Growing apricot trees from seeds is rewarding, but seed dormancy often blocks success. Without proper pre-treatment, your apricot seeds may take months—or never—sprout. The key lies in breaking dormancy through stratification and scarification, mimicking natural conditions the seeds would encounter in the wild.
Apricot seeds need cold moisture exposure to trigger germination. Skipping this step results in slow or failed sprouts. I’ve tested three methods—stratification, scarification, and moisture soaking90% germination rates in just 4-6 weeks. Let’s dive into the exact steps to maximize your success.
Step-by-Step Pre-Treatment for Apricot Seeds
-
Step 1: Extract and Clean Seeds
Remove seeds from ripe apricots, rinse off pulp, and let dry for 24 hours at room temperature. -
Step 2: Scarify the Seed Coat
Use sandpaper (medium grit) or a knife to lightly scratch the hard outer shell. This mimics natural wear and tear, helping water penetrate. -
Step 3: Stratify for 4-6 Weeks
Mix seeds with moist peat moss in a sealed container. Store at 35-40°F (e.g., fridge) for 4-6 weeks. Check moisture weekly—keep damp but not soggy. -
Step 4: Soak for 24 Hours
After stratification, soak seeds in room-temperature water for 24 hours. This hydrates the embryo, signaling it’s time to grow. -
Step 5: Plant Immediately
Sow seeds ½ inch deep in well-draining soil. Keep soil consistently moist (not waterlogged) and place in warmth (70-75°F) for germination.
🌱 Pro Tip: Label your seeds and track stratification start dates to avoid confusion!
Stratification is the most critical step—it mimics winter conditions, tricking the seed into thinking spring has arrived. I’ve seen seeds that failed to sprout without this process, even when planted in ideal soil. The 4-6 week cold period is non-negotiable for apricots, as their seeds are deeply dormant.
If you’re short on time, you can shorten stratification to 3 weeks, but germination rates drop to 60-70%. For best results, stick to the full 6-week period. Pro tip: Use a seed stratification kit if your fridge isn’t cold enough—these maintain precise temperatures.
Once seeds complete stratification, the 24-hour soak jumpstarts hydration. This is where many gardeners rush—skipping the soak can delay germination by 2-3 weeks. Think of it as giving the seed a drinking straw to wake up its dormant embryo.
After planting, maintain consistent moisture and warmth. Place your seed tray under a grow light or in a sunny window (south-facing is best). You should see sprouts in 7-14 days if all steps are followed correctly. If germination stalls after 3 weeks, check for rot (soggy soil) or dryness.
For gardeners in warmer climates (Zones 8-10), you can skip stratification entirely and use scarification alone. However, I recommend combining both methods for maximum reliability, especially if you’re new to seed germination.
Remember, apricot seeds are unpredictable—even with perfect pre-treatment. Some seeds may take up to 8 weeks to sprout. Patience is key! Once sprouted, thin seedlings to the strongest 2-3 plants per pot to avoid competition.
🌿 With these steps, you’ll transform lowly apricot pits into vigorous seedlings ready for transplanting. Happy growing!
Best soil mixes and planting conditions for apricot seedlings
Growing apricot seedlings requires well-draining soil with a slightly acidic to neutral pH (6.0-7.0). The right soil mix prevents root rot while providing nutrients for strong growth. For best results, combine 50% garden soil, 30% perlite or coarse sand, and 20% compost.
This blend ensures aeration and moisture retention without waterlogging—critical for young roots.
Apricot seedlings thrive in full sun exposure (6+ hours daily) and moderate humidity (40-60%). Temperature plays a key role: ideal germination temps range between 60-75°F (15-24°C). If your climate dips below 50°F (10°C), consider starting seeds indoors under grow lights until soil warms.
| Factor | Indoor Germination | Outdoor Germination |
|---|---|---|
| Soil Mix | 50% peat moss, 30% perlite, 20% compost | 60% garden soil, 20% sand, 20% compost |
| Drainage | Excellent (elevated trays) | Good (sloped beds) |
| Light Needs | Grow lights (12-16 hrs/day) | Full sun (6+ hrs/day) |
| Temperature | 65-75°F (18-24°C) | 50-70°F (10-21°C) |
| Humidity | High (50-70%) | Moderate (40-60%) |
| Planting Depth | ½ inch (1.25 cm) | 1 inch (2.5 cm) |
| Transplant Time | After true leaves form | After last frost (spring) |
When planting, place seeds at a depth of ½ inch for indoor starts or 1 inch outdoors. Use sterilized containers to prevent fungal diseases, and maintain consistent moisture (never soggy). If starting outdoors, wait until soil reaches at least 50°F (10°C) to avoid cold damage. Harden off seedlings for 10-14 days before transplanting to acclimate them to outdoor conditions.
Apricot seedlings need well-draining soil to prevent root rot, so avoid compacted clay. Mix in organic matter like compost or aged manure to improve fertility. If your soil is heavy, amend it with sand or coconut coir for better aeration.
Mulch around seedlings with 2-3 inches of straw to retain moisture and suppress weeds—critical for the first growing season.
Monitor humidity levels closely, especially indoors. Use a humidity dome or mist seedlings lightly daily to maintain 50-70% humidity. Outdoors, morning watering is ideal to reduce fungal risks.
Avoid overhead watering once seedlings are established to prevent disease. Fertilize lightly with a balanced 10-10-10 formula 4-6 weeks after germination to support early growth.
For optimal growth, place seedlings in a location with 6+ hours of sunlight daily. If growing indoors, supplement with LED grow lights (12-16 hours/day). Rotate seedlings weekly to prevent leggy growth.
Once hardened off, transplant outdoors in spring after the last frost, spacing seedlings 10-15 feet apart to allow for mature tree size.