
Propagation
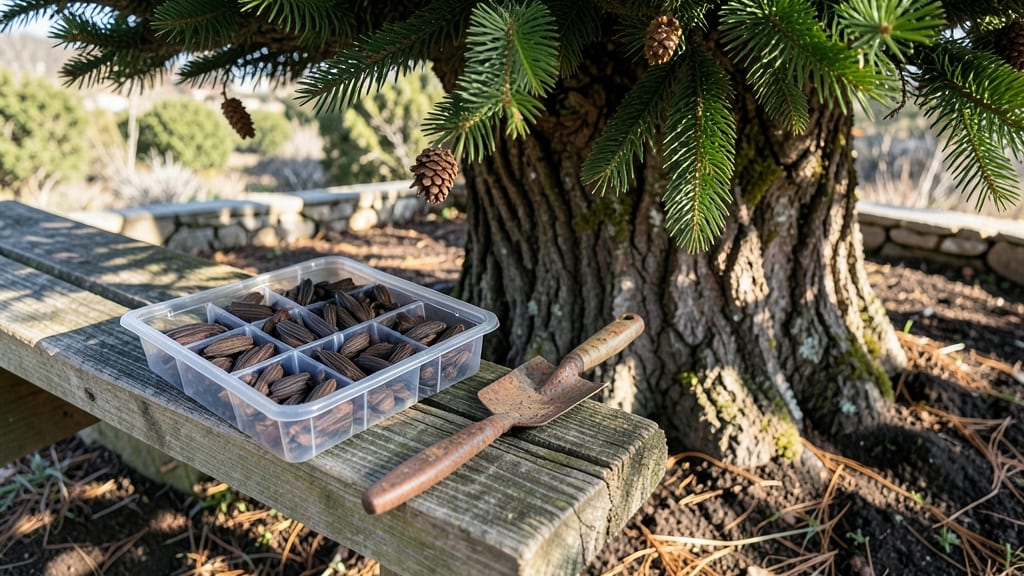
Growing a year-round privacy screen from tiny Araucaria araucana seeds starts with patience and the right conditions. 🌱 These seeds—often overlooked—hold the promise of a striking, evergreen tree that thrives in cold climates where most tropical plants fail.
My first attempt took nearly a year to crack the germination code, but the payoff was worth every wait.
The key lies in mimicking their native Andean environment: well-draining soil with chalky grit, consistent moisture, and a cool but not freezing temperature range.
Most growers rush the process, but Araucaria araucana seeds need 4-6 weeks of cold stratification before they’ll even think about sprouting—think of it as a built-in winter nap. Once they wake up, they’re slow starters, so don’t be alarmed if nothing happens for months.
What you’ll end up with is a slow-but-steady tree that grows 1-2 feet per year—ideal for long-term privacy. The needle-like foliage stays vibrant year-round, and its wind-resistant structure makes it perfect for exposed sites.
The real magic happens when it reaches maturity: a 60-foot-tall evergreen that casts deep shade and blocks views like a fortress. Just don’t expect instant results—this is a decades-long investment in natural beauty.
Here’s the twist: while they’re finicky as seeds, established Araucaria araucana trees are hardy down to -15°F and drought-tolerant once established. That means if you nurture these seeds through their stubborn early stages, you’ll have a low-maintenance privacy solution for life—no fences, no replacements, just pure, wind-sculpted grandeur.
Let’s get those seeds planted right.
📚 In This Guide
- What you need
- Instructions
- Tips and common mistakes
- Wrapping up and next steps
What you need
- ● Fresh or dried Araucaria araucana seeds – 5–10 seeds (ensure they’re plump and free of cracks).
- ● Well-draining potting mix – A blend of peat moss, perlite, and coarse sand (ratio: 2:1:1) or a cactus/succulent mix.
- ● Small pots or seed trays – 3–4 inch diameter (with drainage holes).
- ● Spray bottle – For gentle watering.
- ● Plastic wrap or humidity dome – To maintain moisture.
- ● Grow lights or sunny windowsill – A spot with bright, indirect light (6+ hours/day).
- ● Label markers & tags – To track planting dates.
- ○ Seed scarifier or sandpaper – Helps soften hard seed coats (optional but recommended for faster germination).
- ○ Heating mat (optional) – Keeps soil at 70–80°F (21–27°C) for quicker sprouting.
- ● Fertilizer (balanced, low-nitrogen) – Like 5-5-5 or fish emulsion (use sparingly after germination).
- ● Humidity tray or pebble tray – Extra moisture control for tropical-like conditions.
- ● Pruning shears – For future transplanting or shaping.
Step-by-Step instructions for growing araucaria araucana from seed
Here's how to transform those tiny, winged seeds into a majestic evergreen that thrives year-round.
🌱 Step 1: Stratify Seeds to Break Dormancy
Araucaria araucana seeds need cold stratification to mimic winter conditions and trigger germination. Place the seeds in a sealed plastic bag with slightly damp peat moss—just enough moisture to feel like a wrung-out sponge. Seal the bag and refrigerate for 6-8 weeks at 34-40°F.
Check weekly for mold or excessive moisture—if the moss feels soggy, unwrap the bag for 24 hours to dry slightly. This cold treatment ensures seeds won't rot while they prepare to sprout. I mark the bag with the date to avoid forgetting, since some seeds take up to 12 weeks to respond.
💧 Step 2: Plant Stratified Seeds in Warmth
After stratification, sow seeds ½ inch deep in a sterile seed-starting mix (never garden soil—it's too dense). Use small pots or a seed tray with drainage holes to prevent waterlogging. Keep the mix moist but never soggy—you'll know it's right when the surface stays slightly damp but doesn't pool.
Place the pots in a warm, bright location with 65-75°F soil temperatures. A seedling heat mat helps maintain consistent warmth, which is critical for these slow-to-germinate seeds. Cover the tray with clear plastic wrap to retain humidity, but remove it daily for 10 minutes to prevent fungal growth.
☀️ Step 3: Provide Indirect Light and Patience
Once planted, araucaria seeds need bright, indirect light—direct sun will scorch the delicate seedlings. A south-facing window with sheer curtains works well, or use a grow light 6-8 inches above the tray. You won't see sprouts for 4-12 weeks, so resist the urge to disturb the soil or check constantly.
Keep the soil consistently moist but never waterlogged. Overwatering is the #1 killer of araucaria seedlings—you'll know it's time when the top ½ inch feels dry to touch. If condensation forms inside the plastic wrap, remove it entirely to prevent damping-off disease.
🌿 Step 4: Transplant Seedlings to Individual Pots
When seedlings reach 2-3 inches tall (usually after 3-6 months), carefully transplant them into 4-inch pots with fresh seed-starting mix. Gently loosen the roots to encourage branching—this prevents shock and helps the plant establish faster. Water lightly after transplanting to settle the soil.
Place the pots in a spot with morning sun and afternoon shade to avoid leaf scorch. Araucaria araucana seedlings grow slowly, so don't rush their development. You'll notice new needle growth in 2-3 weeks if conditions are ideal—this is your signal that the plant is thriving.
⏰ Step 5: Gradually Acclimate to Outdoor Conditions
After 12-18 months, when seedlings are 1-2 feet tall, begin hardening them off. Move pots outside for 1-2 hours daily in a sheltered spot, gradually increasing exposure over 2 weeks. Watch for wilting or yellowing—these are signs the plant needs more time to adjust.
Once hardened off, plant outdoors in well-draining soil with full sun to partial shade. Araucaria araucana thrives in USDA Zones 7-10, but young trees need winter protection in colder climates. Mulch around the base to retain moisture and regulate soil temperature.
Tips & tricks for perfect araucaria araucana seed germination
These game-changing strategies will help you coax those stubborn araucaria seeds into thriving seedlings with minimal stress. The key lies in patience and precision—two things that pay off handsomely with this majestic evergreen.
The Stratification Secret: Don't skip the cold treatment in Step 1—this is absolutely critical for breaking dormancy. I've seen seeds rot when people skip this step or use temperatures above 40°F. For extra insurance, consider adding a small packet of vermiculite to your peat moss mix—it helps maintain even moisture without compacting. The 6-8 week window is non-negotiable, but if you're impatient, you can extend to 12 weeks for particularly stubborn seeds. Just mark your calendar and set a reminder!
Moisture Management Mastery: The golden rule for araucaria seedlings is "moist but never soggy." In Step 2, when planting your stratified seeds, use a spray bottle to water the seed-starting mix instead of pouring from above. This prevents soil compaction and ensures even moisture distribution. For that 10-minute daily plastic wrap removal, I recommend setting a timer—it's easy to forget, and fungal growth can wipe out your seedlings before they even sprout.
Lighting Strategy: When it comes to Step 3's indirect light requirement, think of your araucaria as a diva who hates direct sun. If you're using a grow light, position it 6-8 inches above and adjust the height as your seedlings grow. I've found that a simple LED grow bulb works wonders—it's energy-efficient and provides the perfect spectrum for young seedlings. And remember, those 4-12 weeks of waiting are crucial; resist the urge to poke the soil or move the pots around during this period.
Transplanting Technique: In Step 4, when your seedlings reach 2-3 inches, handle them with care—they're more delicate than they appear. Use a small trowel to loosen the roots gently, encouraging them to branch out. I like to water the seedlings thoroughly before transplanting, which helps reduce shock. After repotting, place them in their new 4-inch pots and give them a week of gentle care before introducing them to brighter light conditions. This gradual adjustment period makes all the difference in their survival rate.
Pro Tips for Araucaria Araucana Seeds
- These game-changing strategies will help you coax those stubborn araucaria seeds into thriving seedlings with minimal stress.
- The Stratification Secret: Don't skip the cold treatment in Step 1—this is absolutely critical for breaking dormancy.
- Moisture Management Mastery: The golden rule for araucaria seedlings is "moist but never soggy."
Frequently asked questions
about growing Araucaria araucana from seeds—because even the mighty monkey puzzle tree starts small!How long does it take for Araucaria araucana seeds to germinate?
Araucaria araucana seeds can take anywhere from 3 to 12 months to germinate, depending on conditions. Patience is key—stratification (cold treatment) often speeds up the process. Keep them in a cool, moist environment (like a fridge) for 3–6 months before planting to mimic winter dormancy.
What’s the best temperature for germinating these seeds?
Ideal germination temps range from 60–75°F (15–24°C). If your climate is too hot or cold, use a seedling heat mat or a sunny windowsill. Avoid extreme fluctuations—consistency is crucial! A humidity dome can also help maintain moisture without overheating.
Can I grow Araucaria araucana from store-bought seeds, or do I need wild ones?
Store-bought seeds (from reputable nurseries) work just fine! Wild seeds may carry pests or diseases, but commercially sourced ones are often pre-treated for better germination. Just ensure they’re fresh—Araucaria seeds lose viability quickly. Check for plump, intact nuts without cracks.
Why aren’t my seeds sprouting? Troubleshooting tips?
Try these fixes if germination stalls:
- Check moisture: Seeds must stay damp (not soggy) but never dry out.
- Test viability: Cut open a seed—if it’s hollow or moldy, it’s dead.
- Adjust light: Bright, indirect light is best; avoid direct sun.
- Re-stratify: If seeds are old, repeat the cold treatment for 2 more months.
How do I transplant seedlings without killing them?
Wait until seedlings have 2–3 true leaves (not just cotyledons) and are at least 6 inches tall. Use a well-draining mix (peat + perlite) and a pot with drainage holes. Water thoroughly before and after transplanting, and avoid direct sun for the first week to reduce shock.
Wrapping up and next steps
Growing an Araucaria araucana from seeds is a rewarding journey that transforms tiny nuts into a stunning, year-round privacy tree. 🌱 With patience, the right tools, and a little care, you’ll nurture a majestic specimen that stands as a living monument in your garden.
Ready to take the next step? Start by sourcing high-quality seeds and preparing your propagation space—your future forest begins with just one seed!