
Propagation
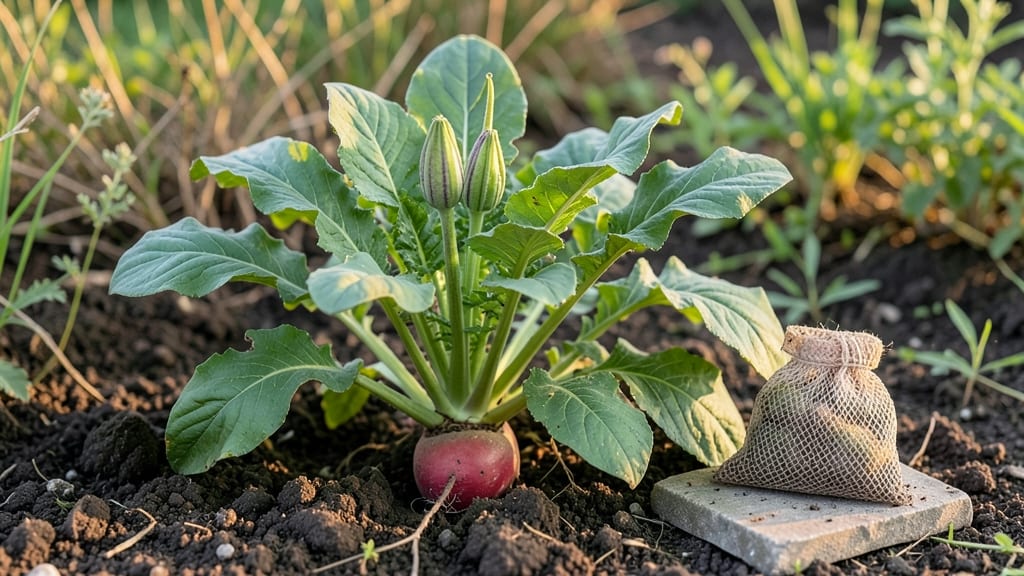
Saving radish seeds from your garden means never buying them again—and the process is simpler than you’d think. 🌱 I’ve collected seeds from my own radish plants for three years now, and the best varieties always come from my own harvest.
The key is timing: you need to let those plants bolt and form seed pods before you can collect anything worthwhile.
You’ll need just a few tools: sharp scissors, paper bags for drying, and a cool, dry spot to store your seeds. Most importantly, pick radish varieties known for seed-saving—like ‘French Breakfast’ or ‘Cherry Belle’—since hybrid varieties won’t produce true seeds.
Once the pods turn brown and papery, they’re ready to harvest, usually about 60 days after planting.
Drying the seeds properly is where many gardeners stumble. Spread the pods on a screen or paper towel in a warm, dry place for 1-2 weeks, then crack them open to release the seeds.
Store them in an airtight container in the fridge, and they’ll stay viable for 3-5 years—ready to replant whenever you’re craving fresh radishes.
Here’s the best part: you’ll save money, support heirloom varieties, and know exactly what you’re planting. Just watch out for cross-pollination with other radishes—keeping different varieties separated by at least 50 feet helps maintain purity. Now let’s get those seeds saved!
📚 In This Guide
- What you need
- Instructions
- Tips and common mistakes
- Wrapping up and next steps
What you need
- ● Mature radish plants: Choose healthy, disease-free varieties (e.g., Daikon, Cherry Belle, or Watermelon radishes). Aim for 10–20 plants to ensure seed diversity.
- ● Scissors or pruners: Sharp, clean tools to harvest seed pods without damaging them.
- ● Paper bags or breathable mesh bags: 1–2 bags per plant (or one large bag for all pods). Avoid plastic—it traps moisture!
- ● Drying surface: A clean, dry tray (wooden or cardboard) or a screen to spread pods for airflow.
- ● Labeling supplies: Waterproof tags or a permanent marker to note the variety, date, and location.
- ● Air-tight storage containers: Small glass jars (like mason jars) or paper envelopes with tight seals.
- ○ Desiccant packets (optional but helpful): Place 1–2 packets in storage containers to absorb excess moisture.
- ● Fan: A small household fan on low speed speeds up drying time.
- ● Seed cleaning kit: A fine mesh sieve or tweezers for removing debris.
- ● Humidity monitor: A hygrometer (ideal humidity: 30–40% during drying).
- ● Vacuum sealer: For long-term storage (extends seed viability by years).
- ● Notebook: To log growing conditions (e.g., temperature, rainfall) for future reference.
Step-by-Step instructions for collecting radish seeds
Here’s how to save seeds from your best radish plants—no special tools needed.
🌱 Step 1: Select and Grow Healthy Radish Plants
Choose the most vigorous radish plants from your garden—look for strong stems, deep green leaves, and no signs of disease. Allow these plants to bolt (send up flowering stalks) naturally by leaving them in the ground after the main harvest. Radishes bolt when days grow shorter and cooler, usually in late summer or early fall.
Water consistently but not excessively—you want steady growth, not soggy soil. If your plants start flowering, that’s your cue they’re ready for seed production. Avoid fertilizing at this stage; too much nitrogen encourages leafy growth over seed development.
☀️ Step 2: Let Flowers Bloom and Seeds Mature
Once flowers appear, let them fully open and pollinate. Radishes are self-pollinating, so you don’t need to worry about cross-pollination from other plants. Wait until the flowers fade and small seed pods form—these will swell and turn brown as seeds mature.
Harvest the seed pods when they’re dry and papery to the touch, usually 3-4 weeks after flowering. If left too long, pods may crack open and scatter seeds. Cut the entire flowering stalk and hang it upside down in a dry, well-ventilated spot for 1-2 weeks to finish drying.
🪴 Step 3: Dry and Clean the Seeds
After the pods are completely dry, gently rub them between your fingers or use a small mesh strainer to separate the seeds from the chaff. Store the seeds in a paper envelope (not plastic—it traps moisture) and label with the variety name and harvest year.
Seeds should be stored in a cool, dark place, like a pantry or seed vault. Radish seeds remain viable for 3-4 years if kept dry. Check for moisture periodically—if seeds feel damp or develop mold, transfer them to a new envelope immediately.
⏰ Step 4: Test Viability Before Next Year’s Planting
Before sowing saved seeds, test their viability by placing 10 seeds between damp paper towels in a sealed plastic bag. Keep them in a warm spot (70-75°F) and check daily. If 70% or more sprout within 5-7 days, your seeds are ready to plant.
If germination is poor, store the remaining seeds for another year or try a fresh batch. Radish seeds lose viability quickly in humid conditions, so proper drying and storage are key to success.
Tips & tricks for perfect radish seed collection
A few key tricks will help you maximize your radish seed harvest without any wasted effort.
The Plant Selection Secret: In Step 1, focus on the healthiest plants with the most vibrant leaves—these are the ones that will produce the strongest seed pods. I always look for plants that have outgrown their edible stage and are putting energy into flowering. Between us, the biggest mistake I see is choosing plants that still look like they're struggling to grow radishes.
Timing is Everything: The 3-4 week window after flowering in Step 2 is critical—don't rush it! I've learned that waiting until the pods are completely dry and papery (not just slightly brown) makes all the difference. If you harvest too early, seeds won't be fully developed, and if you wait too long, they'll scatter everywhere. Hang those stalks in a well-ventilated area where you can keep an eye on them.
Storage Wisdom: That paper envelope in Step 3 isn't just about labeling—it's about moisture control. Plastic bags trap humidity, which is the enemy of seed viability. I store mine in small envelopes inside a larger ziplock bag with a packet of silica gel to absorb any stray moisture. The cool, dark pantry becomes your seed vault, preserving those seeds for up to 4 years.
Germination Test Hack: When testing viability in Step 4, I always use a clear plastic bag instead of an opaque one. This lets me see the sprouting progress without opening it, which maintains humidity levels. The 70-75°F warm spot can be as simple as your kitchen counter near the oven—just avoid direct sunlight which can overheat the seeds.
Pro Tips for Collecting Radish Seeds
- A few key tricks will help you maximize your radish seed harvest without any wasted effort.
- The Plant Selection Secret: In Step 1, focus on the healthiest plants with the most vibrant leaves—these are the ones that will produce the strongest seed pods.
- Timing is Everything: The 3-4 week window after flowering in Step 2 is critical—don't rush it!
Frequently asked questions
Got questions about saving radish seeds?
Here are answers to the most common ones—so you can confidently dry, store, and replant next season!
When is the best time to collect radish seeds?
Harvest seeds when most pods on the plant turn yellowish-brown and start splitting open—usually 60–90 days after planting, depending on the variety. Avoid collecting seeds from plants grown for eating, as they may be treated with chemicals or hybridized (won’t reproduce true to type).
Can I save seeds from store-bought radishes?
Probably not! Most grocery-store radishes are hybrids (F1 varieties), meaning their seeds won’t grow plants identical to the parent. For reliable seeds, use heirloom or open-pollinated varieties from seed savers or organic farms. Always check the seed packet for “suitable for seed saving” labels.
How long can I store radish seeds before they lose viability?
Radish seeds stay viable for 2–4 years if stored properly in a cool, dry place (ideally 32–41°F and 30–50% humidity). Test germination by planting a few seeds—if 80%+ sprout, they’re still good! For longer storage, add a silica gel packet to your seed envelope to absorb moisture.
Do radishes cross-pollinate? Will my seeds grow weird radishes?
Yes, radishes self-pollinate, but they can cross with wild radishes (Raphanus raphanistrum) or other Brassica family members (like turnips or mustards) if they’re nearby. To avoid mix-ups, isolate plants by 500+ feet or grow one variety at a time. If you notice odd shapes or flavors, your seeds may be cross-contaminated!
What if my radish pods are moldy or rotting before I can collect seeds?
Mold or rot usually means high humidity or poor airflow during drying. To fix it:
- Harvest pods earlier (when they’re still firm but starting to yellow).
- Spread them on a paper towel in a shady, well-ventilated spot (not plastic bags!).
- Check for pests—aphids or cabbage worms can spread disease. Treat with neem oil if needed.
Wrapping up and next steps
Collecting and storing radish seeds is a rewarding way to ensure a fresh, homegrown harvest year after year!
With the right techniques—like proper drying, labeling, and storage—you’ll save money and enjoy the satisfaction of growing from seeds you’ve nurtured yourself. Now’s your chance to take the next step: grab those mature radish pods, follow the steps, and get ready to share your newfound skills with fellow gardening enthusiasts.
Happy growing! 🌱✨