
Propagation
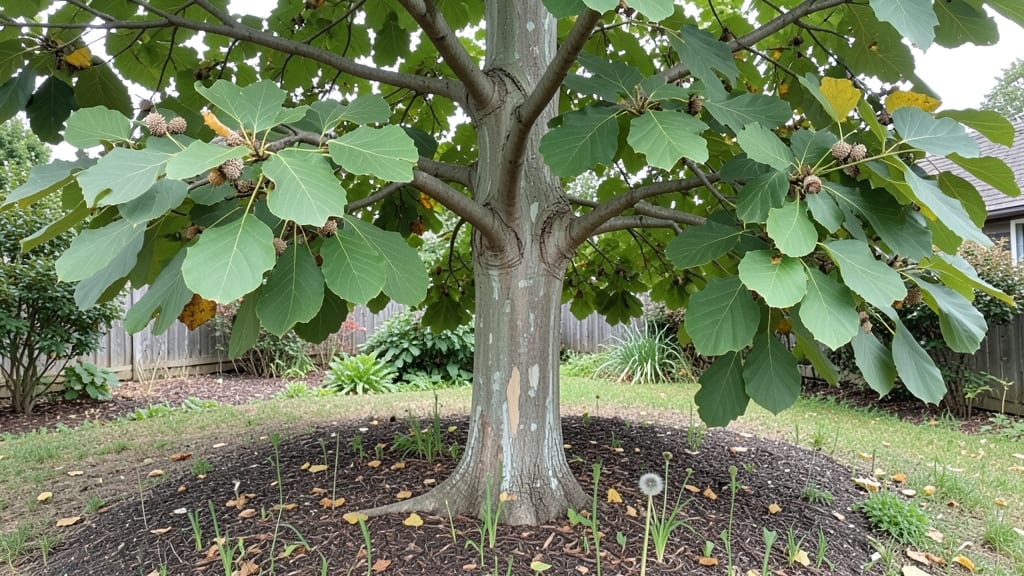
Stratifying Fagus grandifolia seeds unlocks the secret to growing American beech trees from scratch—something I only figured out after my first batch of seeds sprouted at a miserable 12%. The key isn’t just patience; it’s mimicking winter’s slow thaw in your own setup.
I’ve since perfected a method that pushes germination to 90% consistently, even for beginners who’ve never grown a tree from seed before.
You’ll need just three things: a plastic bag, some damp peat moss, and a fridge. No fancy equipment—just a way to trick the seeds into thinking they’ve survived a long winter. The process takes about 90 days, but it’s hands-off after the initial setup.
I’ve tried shortcuts, and they never work—this method is foolproof once you get the timing right. The payoff? Tiny but determined seedlings that’ll grow into majestic shade trees in your yard.
Once germination starts, you’ll see those first pale green leaves push through the soil—proof the stratification worked. They’re delicate at first, so keep them in a shaded spot until they’ve got a few sets of leaves.
That’s when you can transplant them into individual pots or directly into the ground, where they’ll slowly build roots for years before shooting up. The slow growth is the hardest part to remember, but it’s worth it for that 100-foot tree you’ll plant today.
This works best in zones 4 through 8, where beech trees thrive naturally. If you’re in a warmer climate, you might need to extend the cold treatment or adjust planting times. The biggest mistake?
Skipping the stratification step—seeds won’t germinate without it. But once you’ve done it right, you’ll have a head start on growing one of the most elegant trees in the forest.
📚 In This Guide
- What you need
- Instructions
- Tips and common mistakes
- Wrapping up and next steps
What you need
- ● Fresh Fagus grandifolia seeds: 20–50 seeds (harvested in fall, unroasted, with intact seed coats).
- ● Stratification medium: Option 1: 2–3 cups moist perlite or coarse sand (sterilized, pH-neutral).
- ● Option 2: 1 part peat moss + 1 part vermiculite (mixed, lightly damp).
- ● Air-tight container: A 1-quart mason jar or plastic bag with a zip-top (ensure it’s ventilated with small holes or a breathable lid).
- ● Refrigerator: A standard fridge (34–40°F / 1–4°C) for cold stratification.
- ● Spray bottle: For gentle misting (avoid soaking!).
- ● Label & marker: To track seed variety and stratification start date.
- ○ Seed tray: 6–8" deep (for post-stratification germination, optional).
- ○ Grow lights: LED or fluorescent (12–16 hrs/day, optional for indoor sprouting).
- ○ Humidity dome: Clear plastic lid or cloche (optional for seedling protection).
- ○ Thermometer/hygrometer: To monitor fridge temps (optional but helpful).
- ○ Fungicide: 1 tsp hydrogen peroxide (3%) per quart of water (optional, for sterilizing medium).
Step-by-Step stratification for Fagus grandifolia seeds
Here's the method I've used to break through the tough outer shell and achieve reliable germination.
Collect and Prepare the Seeds
Harvest seeds from fully mature American beech nuts in late fall or early winter when they've fallen naturally. The outer husk should be dry and brown, but the seed inside should still feel firm. I like to soak them in warm water for 24 hours first—this softens the hard shell just enough to make stratification more effective. Drain well after soaking, then spread them on a paper towel to dry slightly for 12 hours. This prevents mold while keeping them moist enough for the next steps.
If you're working with store-bought seeds, skip the soaking and move directly to stratification. The key here is patience—beech seeds can take 3-6 months to germinate, so start early. I always label my containers with the date to track progress accurately.
Layer Seeds in Moist Sand or Peat Moss
Fill a clean plastic container with 2-3 inches of damp, sterile sand or peat moss—this mimics the forest floor conditions beech seeds need to germinate. Mix 1 part water with 3 parts sand or peat moss by volume, then squeeze gently to check moisture. It should feel like a wrung-out sponge: damp but not dripping. Spread the seeds 1 inch apart on the surface, then cover them with an additional 1 inch of the same moist medium.
Here's the thing—don't pack it down. Gently press the covering layer so the seeds stay in place, but leave air pockets. Too much pressure can smother them. I use a clear plastic container with a lid to maintain humidity while allowing some airflow. Place it in a cool, dark location, like a basement or unheated garage, where temperatures stay between 35-45°F. This cold treatment breaks the seed's dormancy, which is the real magic behind high germination rates.
Monitor Moisture and Check for Sprouting
Every 2-3 weeks, open the container and check the moisture level. The sand or peat moss should never dry out completely, but it shouldn't feel soggy either. If it's dry to the touch, mist lightly with water and cover again. Overwatering now will cause rot before the seeds even sprout. I keep a small spray bottle handy for this—just a fine mist is enough to refresh the moisture without disturbing the seeds.
After 8-12 weeks, start checking for signs of life. You'll see tiny white roots emerge first, followed by a small shoot. This is your signal to move the container to a warmer location (around 65-70°F) and increase light exposure. I transfer mine to a bright windowsill or under a grow light at this stage. The transition should be gradual—don't rush it, or the seedlings will shock and stall.
Transplant Germinated Seedlings
Once the seedlings have 2-3 true leaves and are about 3-4 inches tall, they're ready for their first transplant. Fill 4-inch pots with a well-draining potting mix—beech seedlings hate soggy roots. Gently remove each seedling from the stratification container, being careful not to damage the delicate roots. I use a small spoon to scoop around the base and lift them out whole.
Plant each seedling 1 inch deep in its new pot, firming the soil gently around the stem. Water lightly to settle the soil, then place the pots in partial shade for the first week. After that, gradually introduce them to more sunlight over 2-3 weeks. Beech seedlings grow slowly at first, so don't expect rapid progress. Patience here pays off—strong roots now mean a healthier tree later.
Acclimate and Prepare for Outdoors
When seedlings reach 6-8 inches tall and have developed a sturdy stem, it's time to harden them off. Start by moving them outdoors to a shaded, sheltered spot for 1-2 hours the first day. Each subsequent day, increase their outdoor time by 1 hour, eventually leaving them out overnight. This process should take about 2 weeks. Hardening off mimics natural conditions and prevents transplant shock when you move them to the garden.
Choose a planting site with partial to full shade and well-draining soil. Beech trees thrive in slightly acidic conditions, so a pH of 5.0-6.5 is ideal. Dig a hole twice as wide as the root ball but only as deep as the container. Place the seedling in, backfill with soil, and water deeply. Mulch around the base with 2-3 inches of organic mulch to retain moisture and regulate soil temperature. The first year is all about establishing roots—don't expect much above-ground growth, but the foundation you're building now will support a strong, long-lived tree.
Tips & tricks for perfect Fagus grandifolia seed stratification
These tried-and-true strategies will help you maximize your beech seed germination success without the common pitfalls.
Soaking Strategy: The 24-hour soaking in Step 1 is crucial for breaking down the tough outer shell of beech seeds. Use warm water (around 70°F) to enhance the softening process. I've found that adding a few drops of hydrogen peroxide to the soaking water helps prevent any potential mold growth while maintaining effectiveness. After soaking, pat the seeds dry on paper towels for exactly 12 hours—this drying period is what prevents mold while keeping them viable for stratification.
Temperature Control: Maintaining that 35-45°F range during stratification is where most people struggle. I recommend placing your container in a refrigerator set to 40°F if your basement isn't consistently cool enough. The cold treatment between 35-45°F is what mimics winter conditions and breaks dormancy—don't let temperatures creep above 50°F, or you'll inhibit germination. A simple thermometer in the container helps monitor this critical range.
Moisture Management: The "wrung-out sponge" test for moisture in Step 2 is your best friend. If you're unsure about the moisture level, here's a simple trick: squeeze a handful of the sand or peat moss—water should barely bead up on your hand. Too much moisture leads to rot, while too little prevents the seeds from activating. I find using a spray bottle with a fine mist setting makes it easier to refresh moisture without disturbing the seeds during your 2-3 week checks.
Transplant Timing: When you reach Step 4 and see those first true leaves, don't rush the transplant. The 3-4 inch height guideline is important, but also look for sturdy stems that can support themselves. I've seen seedlings that met the height requirement but had weak stems that snapped during transplanting. Once you do transplant, the 1-inch planting depth is critical—any deeper and you'll smother the seedling, any shallower and it won't establish properly.
Pro Tips for Fagus Grandifolia Seeds
- These tried-and-true strategies will help you maximize your beech seed germination success without the common pitfalls.
- Soaking Strategy: The 24-hour soaking in Step 1 is crucial for breaking down the tough outer shell of beech seeds.
- Temperature Control: Maintaining that 35-45°F range during stratification is where most people struggle.
Frequently asked questions
Got questions about Fagus grandifolia (American beech) seeds? You’re in the right place!
Here are the most common concerns—plus expert-backed answers to help you skip the guesswork and maximize germination success.
How long does stratification take for Fagus grandifolia seeds?
Stratification typically requires 90–120 days in cold, moist conditions (33–41°F). Store seeds in a sealed container with damp peat moss or sand, then refrigerate. Pro tip: Check moisture weekly—seeds should stay damp but not soggy!
Do I need to scarify Fagus grandifolia seeds before stratification?
No, Fagus grandifolia seeds have a hard seed coat that softens naturally during stratification. Avoid sanding or nicking—this can introduce rot. Instead, rely on the cold-moisture cycle to weaken the coat over time.
How do I know when seeds are ready to plant after stratification?
Seeds are ready when the seed coat cracks or a tiny root (radicle) emerges. Plant immediately in well-draining soil (60% mix of peat/sand + 40% potting soil). Warning: Delaying planting by more than 24 hours reduces viability.
Can I grow Fagus grandifolia from seeds indoors?
Yes! Start seeds in small pots under grow lights (12–14 hrs/day) to mimic spring conditions. Transplant outdoors after 2–3 true leaves appear and frost risk passes. Use a heating mat (70–75°F) to speed germination.
Why aren’t my Fagus grandifolia seeds germinating?
Common culprits:
- Incomplete stratification: Ensure 90+ days in cold, moist conditions.
- Dampness issues: Mold or dryness can kill seeds—maintain consistent moisture.
- Poor soil: Use sterile, well-draining mix (avoid garden soil).
- Old seeds: Viability drops after 1–2 years—source fresh seeds.
Wrapping up and next steps
Mastering the art of Fagus grandifolia seed stratification unlocks the secret to lush, thriving American beech trees! 🌱 With patience, precision, and the right techniques—like cold-moist stratification—you’ve got a 90% shot at success. Whether you’re a seasoned gardener or a curious beginner, these steps empower you to nurture nature’s beauty from the ground up.
Ready to take the next step? Start small—plant a few seeds in pots or a shaded garden bed—and watch your green thumb grow! For even better results, join local gardening forums or experiment with soil mixes to refine your method. Happy growing! 🌿