
Propagation
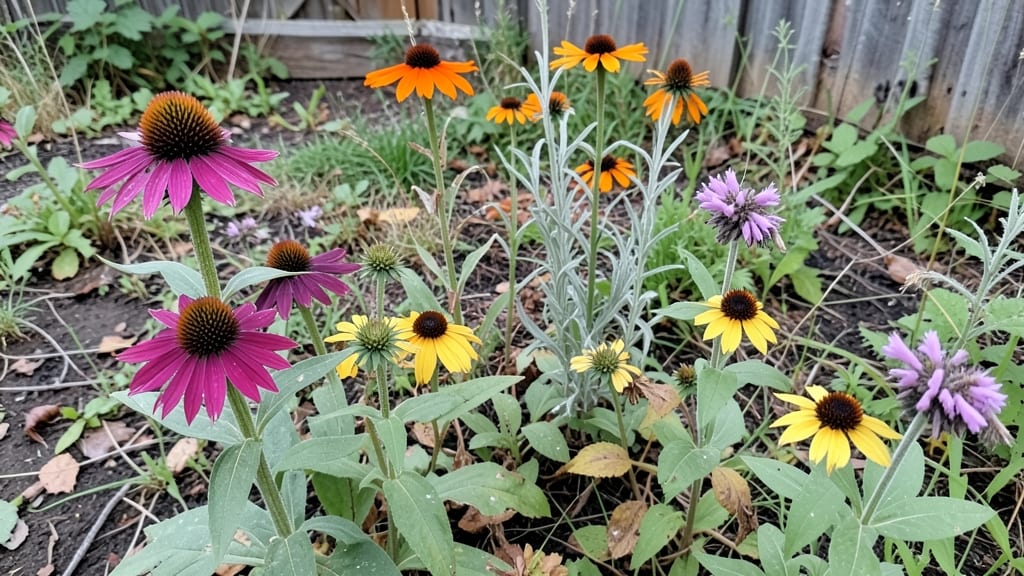
Gathering free native seeds is the easiest way to start a garden that thrives without extra work. 🌱 I’ve collected seeds from local wildflowers and shrubs for years, and once you know where to look, you’ll find them everywhere—along roadsides, in parks, or even in your own backyard.
These seeds grow into hardy plants that support pollinators, require less water, and come back year after year.
Most people don’t realize how simple it is to get started—no money needed. Check with your local native plant society, seed banks, or even government conservation programs for free seed collections. Many offer packets tailored to your region, so you know exactly what will grow best.
All you need is a small bag, a notebook, and a little patience to harvest them yourself once you spot the right plants.
Once you’ve got your seeds, growing them is straightforward. Native plants often prefer well-draining soil and full sun, but they’re tough enough to handle less-than-perfect conditions. Plant them in late summer or early fall for the best results, and within a few weeks, you’ll see tiny sprouts popping up.
Before you know it, your garden will be buzzing with bees and butterflies—no fancy fertilizers required.
Here’s the best part: these plants multiply on their own, so you’ll have free seeds for life. Share extras with neighbors, donate to local restoration projects, or simply enjoy watching your garden become a self-sustaining ecosystem.
The more you grow, the more wildlife you’ll attract—and the less work you’ll have to do.
📚 In This Guide
- What you need
- Instructions
- Tips and common mistakes
- Wrapping up and next steps
What you need
- ● Native seed collection: 1–2 cups of local, native seeds (e.g., coneflowers, black-eyed Susans, or milkweed). 💡 Pro tip: Check seed-saving exchanges or local botanical gardens for free samples!
- ● Seed-starting mix: 2–3 gallons of sterile, well-draining potting soil (or coco coir for sustainability).
- ● Containers: 6–12 biodegradable pots (3–4" diameter) or
- ● 1–2 seed trays with drainage holes.
- ● Watering can or spray bottle: With a fine rose nozzle for gentle moisture.
- ● Grow lights or sunny windowsill: 6–8 hours of bright, indirect light daily (or LED grow lights for 12–14 hours if indoors).
- ● Seedling heat mat: For cold climates to speed up germination.
- ● Humidity dome or plastic wrap: To retain moisture during early growth.
- ● Pruners or small scissors: For transplanting delicate seedlings.
- ● Label markers & tags: To track seed varieties (especially if mixing types!).
- ● Garden gloves: For handling prickly or dusty seeds comfortably.
- ● Knowledge of local climate: Native seeds thrive in specific zones—check USDA maps or local nurseries for guidance.
- ● Patience: Some native seeds (like milkweed) take 2–4 weeks to sprout!
- ● Outdoor space: A sunny garden bed, balcony, or even a container garden for mature plants.
- ○ Optional: A seed-saving journal to log varieties, germination dates, and plant behaviors.
Step-by-Step guide to collecting and growing free native seeds
Here's how to build your own native seed collection for vibrant, low-maintenance gardens that thrive year-round.
🌱 Step 1: Identify and Locate Mature Native Plants
Start by scouting local wild spaces, parks, or established native gardens for plants that produce seeds. Focus on species that have fully matured—look for seed heads that have turned brown or dried out, like the purple coneflower or black-eyed Susan. I always check the underside of seed heads for tiny fluffy or papery structures, which signal readiness for collection.
Use a field guide or plant identification app to confirm species before harvesting. Native seeds are often region-specific, so prioritize plants that thrive in your hardiness zone. For example, milkweed in the Midwest or goldenrod in the Northeast. Avoid plants near roadsides or sprayed areas to ensure seed purity.
🌿 Step 2: Harvest Seeds at the Right Stage
Timing is everything—collect seeds when they’re fully mature but before they scatter naturally. For most native wildflowers, this means waiting until the seed heads are dry and crispy to the touch, often in late summer or early fall. Gently twist or cut the seed head with clean pruners, leaving some stems attached to prevent seed loss.
Place harvested seed heads in a paper bag and label them immediately with the plant name, date, and location. Real talk: I’ve learned the hard way that mislabeling leads to confusion later. Store the bags in a cool, dry place for 1-2 weeks to complete drying. If seeds are still damp, spread them on a tray lined with newspaper for faster drying.
💧 Step 3: Clean and Store Seeds Properly
Once fully dry, remove seeds from their heads by rubbing them between your fingers or using a fork to gently scrape off chaff. For stubborn seeds like coneflowers, I place the dried heads in a jar and shake vigorously until seeds fall out. Sift the mixture through a fine mesh screen to separate seeds from debris.
Store cleaned seeds in airtight containers—glass jars or resealable bags work best—in a cool, dark place. Most native seeds retain viability for years, but always label with the collection date. For extra longevity, add a packet of silica gel to absorb moisture. I’ve successfully grown seeds from collections made 5 years ago!
☀️ Step 4: Prepare Seedbeds for Direct Sowing
Native seeds often germinate best when sown directly in the garden rather than started indoors. Choose a sunny, well-draining spot and loosen the soil to a depth of 6 inches. Avoid tilling, which disrupts beneficial soil microbes. Scatter seeds thinly—most native species don’t need deep planting, so a light press into the top ¼ inch of soil is sufficient.
Water gently but thoroughly after sowing to settle seeds without displacing them. Mulch lightly with straw or leaves to retain moisture and deter weeds. Native seeds often require cold stratification (a period of cold, moist conditions) to germinate, so sow in fall or early spring. You’ll see sprouts within 2-6 weeks, depending on the species.
⏰ Step 5: Maintain and Propagate Your Native Seed Collection
Once plants establish, allow some to flower and set seed to expand your collection. Deadhead spent blooms only if you’re saving seeds—otherwise, let nature do its work. Native plants are incredibly resilient; they thrive with minimal intervention once established. Water deeply but infrequently to encourage deep root growth.
Share extra seeds with neighbors or local conservation groups to spread biodiversity. I’ve turned my small backyard into a mini seed bank, and now my garden buzzes with pollinators year-round. The best part? These seeds are free, sustainable, and perfectly adapted to your local climate.
Tips & tricks for perfect native seed collection
Transforming wild spaces into thriving gardens starts with these game-changing insights that'll elevate your native seed collection game.
Timing is Everything: In Step 2, when harvesting those crispy seed heads, don't rush! The 1-2 week drying period in Step 2 is non-negotiable—it ensures maximum viability. I've seen seeds shatter when dried too quickly, so resist the urge to speed up the process. For stubbornly damp seeds, try placing them on a mesh screen over a fan on low heat for accelerated drying without compromising quality.
Labeling System: I can't stress this enough—implement a rigorous labeling system from the moment you harvest in Step 2. Use waterproof labels with plant name, date, and location. Pro tip: Include your hardiness zone on all containers. I once mixed up milkweed and goldenrod seeds because I skipped this step—don't make my mistake!
Storage Secrets: For long-term storage in Step 3, consider using vacuum-sealed bags instead of just airtight containers. They remove all oxygen, preserving viability for up to a decade. Place a small silica gel packet in each bag, and store in your refrigerator's crisper drawer where temperatures stay consistently cool. This mimics natural winter stratification conditions.
Sowing Strategy: When preparing seedbeds in Step 4, create micro-climates by sowing seeds in different sun exposures. Some native species like partial shade, while others thrive in full sun. Mark your sowing areas with stakes labeled by species and date—this helps track germination patterns and future plant performance. The ¼ inch depth recommendation is perfect for most species, but larger seeds like milkweed can handle a slightly deeper planting.
Pro Tips for Free Native Seeds
- Transforming wild spaces into thriving gardens starts with these game-changing insights that'll elevate your native seed collection game.
- Timing is Everything: In Step 2, when harvesting those crispy seed heads, don't rush!
- Labeling System: I can't stress this enough—implement a rigorous labeling system from the moment you harvest in Step 2.
Frequently asked questions
Got questions about free native seeds? You’re not alone!
Here are answers to the most common queries—from sourcing to growing—so you can dive in with confidence.
Where can I find free native seeds legally?
Check local native plant societies, conservation groups, or government programs like the USDA Plant Materials Centers. Many seed libraries, botanical gardens, and even roadside pull-offs (with permission!) offer free, regionally adapted seeds. Always verify the source to avoid invasive species.
When is the best time to collect native seeds?
Timing depends on the plant! For most wildflowers and grasses, wait until seed heads brown and dry but before they shatter. Early morning collections (after dew dries) work best. Native Plant Societies often post seed-harvest calendars for your area.
Can I use store-bought seeds instead of native ones?
Store-bought seeds may grow, but they won’t support local ecosystems like native varieties. Non-native plants can outcompete wildlife, disrupt food chains, and require more water/pesticides. Stick with regionally adapted seeds for pollinators, soil health, and low-maintenance growth.
How do I store collected seeds for next year?
Clean seeds thoroughly, then store them in a cool (32–40°F), dry place (like a fridge) in paper envelopes or breathable containers. Label with the plant name and date! Most seeds last 1–3 years, but some (like milkweed) may need stratification—check resources like the Seed Savers Exchange for tips.
Why aren’t my native seeds germinating?
Common culprits: too much moisture (rot), wrong soil (sandy vs. clay), or lack of stratification (some seeds need cold/warm cycles). Try scarifying hard coats with sandpaper or soaking in water for 24 hours. If still stuck, test a small batch in pots with sterile potting mix.
Wrapping up and next steps
Embracing free native seeds isn’t just about saving money—it’s a celebration of sustainability, biodiversity, and the joy of nurturing life from the ground up! 🌱 By collecting, storing, and sowing seeds from your local ecosystem, you’re not only ensuring year-round blooms but also supporting pollinators and preserving heritage varieties.
Whether you’re a seasoned gardener or just starting, every seed you save is a step toward a greener, more resilient future.
Ready to take the next step? Start small—pick one native plant to focus on this season, document your progress, and share your blooms with fellow gardeners! Your garden (and the planet) will thank you.