
Size
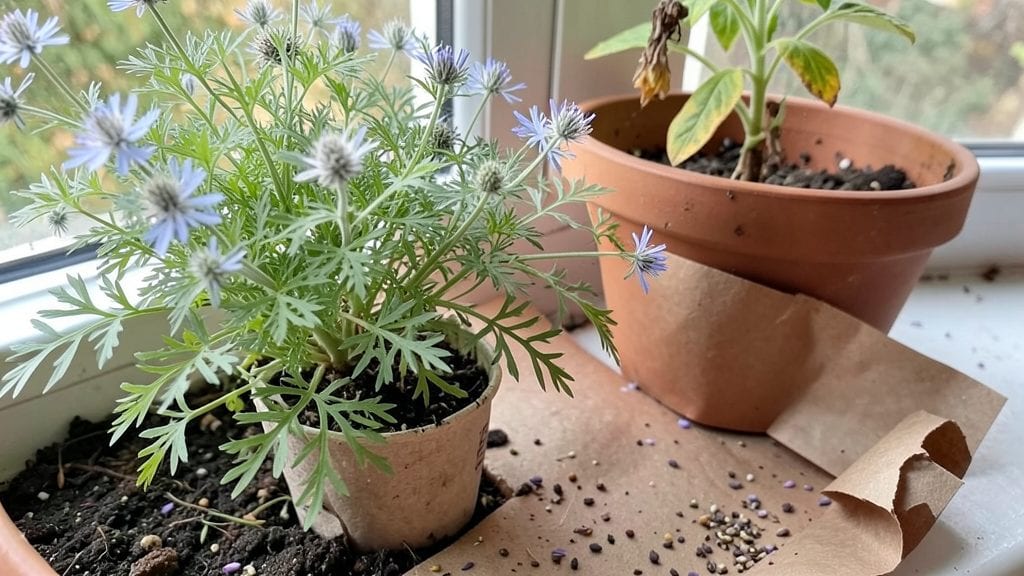
Growing seed paper turns trash into thriving wildflowers with just a little water and sunlight. 🌱 I discovered these biodegradable cards after watching them bloom in a friend’s garden—now I make my own for gifts, meadows, and even window boxes.
The process is simpler than you’d think, and the results are shockingly lush for something that starts as paper.
You’ll need a few basic supplies: recycled paper, wildflower seeds, a blender, and a bit of water. The key is blending the paper into pulp, mixing in seeds, then drying the mixture into sheets.
No fancy equipment—just a cookie sheet and patience. Once planted, these cards break down naturally, giving seeds the perfect start without plastic or chemicals.
Within days, you’ll see tiny sprouts pushing through the paper, and by summer, you could have a vibrant meadow. The best part? No digging, no transplanting—just lay them down and let nature take over. Perfect for pollinators, small spaces, or anyone who loves low-maintenance gardening.
Works for wildflowers, herbs, or even vegetables like lettuce—just adjust the seed mix. Here’s how to make yours bloom reliably, even if you’ve never grown from seed before.
📚 In This Guide
- What you need
- Instructions
- Tips and common mistakes
- Wrapping up and next steps
What you need
- ● Seeds: Choose fast-growing wildflower or herb seeds (e.g., cosmos, marigold, or basil). Aim for 1–2 teaspoons per sheet (adjust based on seed size).
- ● Unbleached paper: Use 100% cotton or recycled paper (e.g., printer paper, cardstock, or scrapbook paper). Avoid glossy or coated paper.
- ● Water: Distilled or dechlorinated water (to avoid harming seeds). About ½ cup per batch.
- ● Blender: A standard kitchen blender (high-powered blenders may pulverize seeds too finely).
- ● Mold & deckle (or DIY frame): A reusable frame (or a sturdy cardboard box with a screen) to shape your paper. Dimensions: 3"x5" to 8.5"x11" (standard card sizes).
- ● Spray bottle: For misting the paper while drying.
- ● Drying surface: A flat, absorbent towel or mesh screen.
- ● Rolling pin or smooth stone: To press out air bubbles and even out thickness.
- ● Drying rack: Elevates paper to prevent warping.
- ● Natural dyes: Turmeric, beet juice, or coffee for colored paper (add 1 tsp per batch to the pulp).
- ● Embossing tools: For adding textures or designs before drying.
- ○ Sealant (optional): A light coat of non-toxic, water-based glue (e.g., flour paste) to protect edges before planting.
Step-by-Step instructions for creating seed paper
This eco-friendly project turns ordinary paper into living wildflower gifts—here's how to make it right.
🌱 Step 1: Mix the Seed and Water Solution
Start by blending 1 cup of wildflower seeds (choose a mix with similar-sized seeds for even distribution) with 1 cup of water in a blender. Pulse until you achieve a smooth, creamy consistency—this ensures seeds embed evenly throughout the paper. I like to add ½ teaspoon of psyllium husk powder to this mixture for extra binding strength; it acts like a natural glue that holds the fibers together once dry.
If your seeds are particularly fine (like clover or tiny wildflowers), strain the mixture through a fine-mesh sieve to remove any clumps. The goal is a uniform, paint-like texture that will coat the paper fibers perfectly. Here's the thing—don't rush this step. A smooth blend prevents seed clusters that could rot or fail to sprout later.
💧 Step 2: Prepare the Paper Pulp
Tear 4-6 sheets of recycled paper (like notebook paper or junk mail) into ½-inch strips and soak them in 2 cups of warm water for at least 30 minutes. The paper needs to break down completely into a mushy pulp—you'll know it's ready when you can easily tear it apart with your fingers. Drain any excess water through a strainer, leaving you with a thick, wet pulp.
Add the soaked paper pulp to your seed-water mixture and stir vigorously with a spoon or your hands (wear gloves—this gets messy!). You want a thick, moldable paste that holds its shape when pressed. If it's too runny, add more recycled paper; if too stiff, drizzle in a little more water. The texture should resemble wet clay—this consistency ensures your seed paper will hold together when dry.
☀️ Step 3: Shape and Dry the Seed Paper
Lay out a silicone baking mat or parchment paper on a flat surface. Spread your seed-paper mixture evenly across it, using your hands or a spatula to create a ⅛-inch thick layer. Press firmly to remove air bubbles and create a smooth surface. For cards, use a cookie cutter or template to shape the mixture while it's still wet—this makes cutting clean edges later much easier.
Let the seed paper dry completely in a warm, dry place away from direct sunlight for 24-48 hours. You'll know it's ready when it's stiff enough to handle without crumbling. Avoid drying it in direct sunlight, which can cause the paper to warp or crack. Once dry, gently peel it off the silicone mat—it should come away intact and ready for planting.
🌿 Step 4: Plant and Care for Your Seed Paper
To plant, simply place your seed paper directly on prepared soil in your garden bed or container. Press it lightly into the earth to ensure good contact with the soil. Water gently but thoroughly—this activates the seeds and helps them establish roots. You'll see sprouts emerge within 7-14 days, depending on the seed variety and weather conditions.
Keep the soil consistently moist (not soggy) for the first 4-6 weeks until seedlings are established. Here's where it gets fun—watch as your "paper" transforms into a vibrant wildflower patch! Once the flowers bloom, you can either let them self-seed for future growth or harvest them for bouquets. The best part? No plastic packaging, no waste—just pure, biodegradable beauty.
Tips & tricks for perfect seed paper
Creating seed paper is like making art with nature—here's how to make it absolutely stunning and functional!
Seed Blending Secret: For the smoothest seed-water mixture in Step 1, pulse your blender in short bursts rather than continuously. This prevents overheating and ensures even distribution of seeds throughout the paper. If your seeds are particularly fine (like clover), straining through a fine-mesh sieve is a game-changer—it removes clumps that could create uneven sprouting later. Trust me on this: the extra 2 minutes of straining prevents headaches down the road!
Paper Pulp Texture Matters: In Step 2, the 30-minute soak time is critical for breaking down the paper fibers completely. If your pulp still feels fibrous after soaking, tear it into even smaller pieces and add a splash more warm water. The goal is a thick, moldable paste that resembles wet clay—this consistency is what makes your seed paper strong enough to handle when dry. I've learned this the hard way after making paper that crumbled when I tried to peel it off the mat!
Drying Strategy: The 24-48 hour drying time in Step 3 is your best friend for preventing warping. Place your seed paper in a warm, dry spot with good airflow—like an open cabinet or a drying rack. Avoid direct sunlight, which can cause uneven drying and cracking. Pro tip: If you're in a hurry, you can speed up drying by placing a fan on low setting nearby, but don't rush it completely. Patience here ensures your paper will be sturdy and beautiful!
Planting Preparation: Before planting your seed paper, give it a gentle mist with water to reactivate the seeds. This step is often overlooked but makes a huge difference in germination rates. When you press it into the soil in Step 4, make sure it makes good contact with the earth—this ensures moisture reaches all the seeds. For best results, keep the soil consistently moist (not soggy) for the first 4-6 weeks. This is when your little plants are establishing their roots and need that extra care!
Pro Tips for Grow Seed Paper
- Creating seed paper is like making art with nature—here's how to make it absolutely stunning and functional!
- Seed Blending Secret: For the smoothest seed-water mixture in Step 1, pulse your blender in short bursts rather than continuously.
- Paper Pulp Texture Matters: In Step 2, the 30-minute soak time is critical for breaking down the paper fibers completely.
Frequently asked questions
Got questions about growing seed paper?
You’re not alone—this eco-friendly gardening method sparks curiosity! Below, we’ve answered the most common questions to help you plant, grow, and troubleshoot with confidence.
How long does it take for seed paper to sprout?
Seed paper typically sprouts within 7–14 days after planting, depending on the seeds, moisture, and temperature. Keep the soil consistently damp (not soggy) and place it in a warm, sunny spot. Some fast-growing varieties, like clover or grass, may appear in 5–7 days, while flowers or herbs might take a little longer.
Do I need to water seed paper differently than regular seeds?
Yes! Seed paper is more delicate, so avoid soaking it—instead, mist it lightly with water until the paper dissolves (usually within 24–48 hours). After planting, keep the soil moist but not waterlogged. A spray bottle or gentle watering can works best to prevent the paper from breaking apart before seeds germinate.
Can I plant seed paper indoors or only outdoors?
Seed paper can grow both indoors and outdoors, but success depends on light and space. For indoor growth, place it near a sunny window or under grow lights. Outdoors, direct sunlight is ideal. If planting indoors, use a small pot with drainage—once seedlings are established (2–3 inches tall), transplant them to your garden.
Will seed paper survive frost or cold weather?
Most seed paper contains hardy annuals or biennials, but newly planted paper is frost-sensitive. Wait until after the last frost in your area (check your USDA hardiness zone) to plant. If frost is forecasted, cover the paper with a thin layer of mulch or a cloche until temperatures rise. Cold-hardy varieties like wheatgrass or alyssum may tolerate light frost better.
What can I do if my seed paper doesn’t sprout?
Don’t worry—seed viability can drop over time. Try these fixes:
- Check moisture: Seed paper needs consistent dampness. If the soil is dry, rehydrate it gently.
- Test seeds: Place a few seeds from the paper on a damp paper towel in a warm spot. If they don’t sprout in 7–10 days, the seeds may have expired.
- Adjust light: Seed paper needs at least 4–6 hours of sunlight daily. Move it to a sunnier spot or supplement with grow lights.
- Try again: Some seed papers have a lower germination rate. Purchase fresh or opt for a different blend.
Are there alternatives to seed paper for eco-friendly planting?
If seed paper isn’t your style, consider:
- Seed bombs: Clay or soil pellets with wildflower seeds—great for guerrilla gardening.
- Biodegradable pots: Made from coconut coir or peat, these dissolve into the soil.
- DIY seed tape: Plant seeds directly on strips of biodegradable fabric or paper towels.
- Compostable seed envelopes: Some companies sell plantable seed packets made from recycled materials.
Wrapping up and next steps
Growing seed paper is a simple yet rewarding way to blend creativity with sustainability! Whether you’re crafting plantable cards, eco-friendly gifts, or educational tools, this method turns waste into wildflowers—literally. 🌱 Start small, experiment with designs, and watch your efforts bloom into vibrant garden additions.
Ready to take the next step? Share your creations with the seed-paper-loving community or explore how to scale up for larger projects. Your green thumb (and the planet) will thank you!