
Lawn
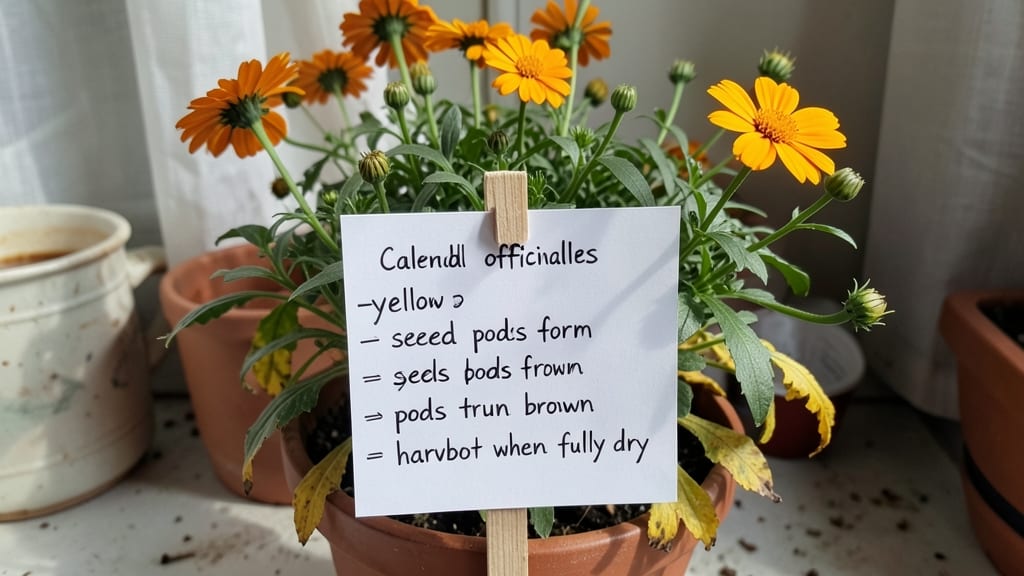
A simple seed saving chart will turn this year’s garden into next year’s harvest—just follow when to harvest, how to dry, and which seeds thrive best. 🌱 I’ve saved seeds for five growing seasons, and the best way to avoid confusion is a clear timeline for each plant. and where to store them so they stay viable.
The key is knowing your plants’ rhythms, because a tomato seed saved at the wrong time won’t grow true to type.
You’ll need just a few supplies: paper bags for drying, envelopes for storage, and a notebook to track varieties. Most seeds keep well for 2-3 years if stored in a cool, dark place, but some—like onions—last only a year.
The real game-changer? Labeling everything immediately, because nothing’s more frustrating than a mystery packet of seeds that might be basil or a weed.
By following species-specific timelines, you’ll end up with seeds that sprout reliably and produce plants just like their parents. Imagine plucking a ripe tomato in August, saving its seeds, and growing identical heirlooms next June—no store-bought plants needed.
The process turns gardening into a self-sustaining cycle that saves money and keeps rare varieties alive.
This works for vegetables, herbs, and flowers alike, whether you’re a backyard gardener or have just a few pots on a balcony. The only rule? Start small—master one or two plants first before tackling your entire garden. Next year’s seeds are waiting for you to begin.
📚 In This Guide
- What you need
- Instructions
- Tips and common mistakes
- Wrapping up and next steps
What you need
- ● Seed-saving chart template: Printable or digital chart (downloadable from gardening resources or DIY with graph paper).
- ● Permanent markers: 2-3 (black, blue, or colored for clarity).
- ● Ruler or measuring tape: 1 (for precise spacing).
- ● Pencil & eraser: For planning before finalizing.
- ● Sticky notes or tabs: 5-10 (for quick updates or reminders).
- ● Plant-specific seed-saving guide: A reference book or online resource (e.g., Seed to Seed by Suzanne Ashworth).
- ● Laminator & laminating sheets: To protect your chart from wear and tear.
- ● Dry-erase markers: If laminating, for easy edits.
- ● Clipboard or binder: To keep your chart portable in the garden.
- ● Digital calendar app: For syncing deadlines with your phone.
- ● Small magnifying glass: To check fine details on seeds or labels.
- ● Basic knowledge of your plants’ life cycles (annuals vs. perennials).
- ● Access to mature, healthy plants for seed collection.
- ● Dedicated space for seed storage (cool, dry, dark area like a pantry).
- ● Patience! Some seeds take months to fully mature.
How to create your own seed saving timeline
Keep these species-specific steps handy to preserve your best plants for next season.
🌱 Step 1: Identify Your Plants and Their Traits
First, walk through your garden and jot down which plants you want to save seeds from. Focus on open-pollinated varieties—hybrids won’t produce true seeds. Look for plants that thrive in your climate, resist pests, and produce abundant, healthy harvests. I always prioritize tomatoes, peppers, beans, and lettuce because they’re easy to save and store well.
Check for true-breeding traits—like disease resistance or unique colors—that you want to maintain. For example, if your red heirloom tomato is your favorite, save seeds from that specific plant, not a mixed batch. Label everything immediately with a waterproof marker to avoid confusion later.
⏰ Step 2: Determine Pollination and Maturity Timelines
Each plant has its own seed maturity timeline, which varies by species. For tomatoes and peppers, seeds are ready when the fruit is fully ripe and slightly soft. With beans and peas, pods should turn dry and papery before harvesting. I keep a small notebook by my garden to track when each plant reaches its harvest-ready stage—usually 7-14 days after flowering for most vegetables.
Pay attention to pollination type: Some plants, like cucumbers and squash, self-pollinate, while others, like corn and beans, cross-pollinate easily. If you’re saving seeds from cross-pollinated plants, isolate them by at least 50 feet or use row covers to prevent unwanted mixing. This ensures your saved seeds grow true to type next year.
💧 Step 3: Harvest and Process Seeds Properly
Once your plants reach maturity, harvest the seeds at the right stage to ensure viability. For tomatoes and peppers, scoop out the gel and seeds, then ferment them in a jar of water for 3-5 days. This fermentation step removes the gelatinous coating and helps separate viable seeds from debris. Strain the seeds through a fine mesh sieve, then rinse them thoroughly.
For beans and peas, let the pods dry completely on the plant before harvesting. Once fully dry, crack open the pods and remove the seeds. Store them in a paper envelope (not plastic) in a cool, dark place—like a seed catalog suggests. Label each envelope with the plant name, variety, and harvest date to keep track of freshness.
✂️ Step 4: Dry and Store Seeds for Long-Term Viability
After processing, spread seeds on a paper towel in a single layer and let them dry for 1-2 weeks in a well-ventilated area. This prevents mold and ensures they’re ready for storage. Once completely dry, transfer them to airtight containers—like glass jars or vacuum-sealed bags—to protect them from moisture and pests.
Store seeds in a cool, dark place with consistent humidity, like a pantry or refrigerator. Most seeds stay viable for 1-5 years, depending on the species. I always test a few seeds from each batch before planting to confirm they’re still good. If they sprout within 7-10 days, you’re golden—if not, it’s time to order new ones.
🌿 Step 5: Test and Refine Your Seed Saving System
Next season, plant a few seeds from your saved batch and compare them to store-bought varieties. Note any differences in growth habits, disease resistance, or yield. If your saved seeds perform well, you’ve got a reliable, homegrown source for next year. If not, adjust your methods—maybe isolate plants better or harvest seeds earlier.
I keep a seed-saving journal to track which varieties thrive and which don’t. Over time, you’ll refine your process and end up with a custom garden library tailored to your climate and preferences. That’s the real reward—self-sufficiency and the joy of growing plants that are truly yours.
Tips & tricks for perfect seed saving timelines
These practical insights will help you avoid common pitfalls and maximize your seed-saving success.
Selection Tip: When choosing plants to save seeds from in Step 1, focus on the healthiest specimens in your garden. The most vigorous plants—those with strong stems, abundant flowers, and resistance to pests—will produce the best seeds. I always skip plants that show signs of disease or stress, as these traits can carry over to next year's seeds. For tomatoes, pick the plant with the most consistent flavor and yield, not just the biggest fruit.
Pollination Strategy: In Step 2, isolation is key for cross-pollinated plants like corn and beans. If you don't have space for the required 50-foot separation, consider using row covers or even planting them in containers on your balcony. For self-pollinating plants like tomatoes and peppers, you can bag flowers before they open if you're worried about accidental cross-pollination from neighboring plants. This extra precaution ensures your saved seeds will grow true to type next season.
Harvesting Secret: The 3-5 day fermentation process for tomato and pepper seeds in Step 3 might seem like a waiting game, but it's worth it. This step removes the gelatinous coating that can inhibit germination. I like to stir the jar of seeds and water once a day during fermentation—this helps break down the pulp faster. After straining, spread the seeds on a paper towel to dry. If you're short on time, you can reduce the fermentation to 2 days, but you might need to scrub the seeds more thoroughly to remove all the pulp.
Storage Wisdom: In Step 4, the 1-2 week drying period is crucial for preventing mold. I use a mesh screen over a cardboard box to create airflow while keeping seeds contained. Once completely dry, I transfer them to glass jars with tight-sealing lids. The cool, dark pantry is my preferred storage spot, but if you have a basement with consistent humidity, that works too. Remember to label your containers with both the plant name and harvest year—next year's you won't remember which seeds are which!
Pro Tips for Seed Saving Chart
- These practical insights will help you avoid common pitfalls and maximize your seed-saving success.
- Selection Tip: When choosing plants to save seeds from in Step 1, focus on the healthiest specimens in your garden.
- Pollination Strategy: In Step 2, isolation is key for cross-pollinated plants like corn and beans.
Frequently asked questions
Got questions about seed saving? You’re not alone! Here are answers to the most common queries to help you master your seed-saving chart like a pro.
What’s the best time to start saving seeds from my lawn or garden plants?
Timing depends on the plant! For most annuals (like tomatoes or beans), save seeds when the pods turn dry and brown—usually after the first frost. Perennials (e.g., herbs or peppers) often need seeds harvested in late summer or early fall. Check your seed-saving chart for plant-specific cues like pod browning or flower wilting.
How long can I store saved seeds before they lose viability?
Seed lifespan varies wildly! Leafy greens (like lettuce) may last 1–2 years, while beans or peas can stay viable for 3–5 years if stored properly (cool, dry, dark). Use your chart to track seed age—most seeds lose potency after 50–80% of their labeled shelf life. Test germination by planting a few seeds to confirm viability.
Can I save seeds from hybrid plants, or will they grow true to type?
Hybrid seeds (marked "F1") often won’t produce identical plants—you might get a wild mix of traits! Stick to open-pollinated or heirloom varieties listed on your chart for reliable results. If you’re curious, try saving hybrid seeds anyway—it’s a fun experiment (just don’t expect perfection!).
What’s the ideal storage temperature and humidity for saved seeds?
Keep seeds in a cool (32–41°F), dry (30–50% humidity) spot, like a sealed jar in the fridge or freezer. Avoid moisture (your enemy!) and direct sunlight. A silica gel packet in your storage container helps absorb excess humidity. Label everything with the harvest date for easy tracking!
What do I do if my saved seeds won’t germinate?
First, check storage conditions—moisture or heat could’ve ruined them. Try scarifying (lightly nicking the seed coat) or soaking in warm water for 24 hours for tough seeds (like tomatoes). If all else fails, your chart’s "germination test" notes can guide you. Don’t give up—even "failed" seeds might surprise you!
Still stumped? Drop your question in the comments—we’re happy to help!
Wrapping up and next steps
Mastering a seed saving chart is your ticket to a thriving, self-sustaining garden next year!
By understanding species-specific timelines—whether it’s the 60-day wait for tomatoes or the 90-day mark for beans—you’re not just saving seeds; you’re investing in resilience and sustainability. 🌱 Start small, track your progress, and soon you’ll be sharing your hard-won knowledge (and seeds!) with fellow green thumbs.
Ready to dive deeper? Grab a notebook, jot down this year’s harvest notes, and sketch out your first seed saving chart for 2025. Every seed you save is a step toward a greener future—let’s grow it together! 🌍✨