
Propagation
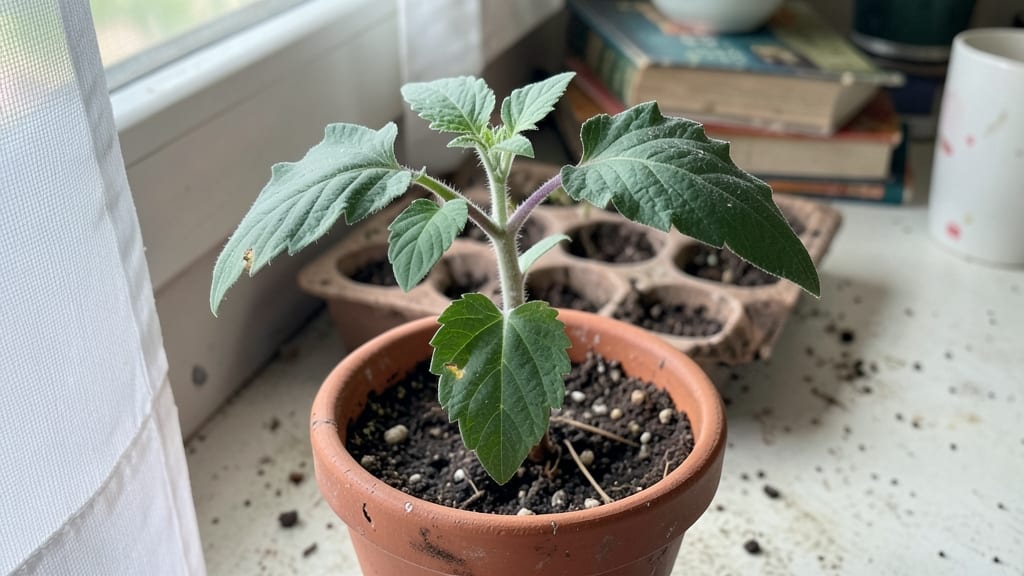
Finding cheap veg seeds doesn’t mean sacrificing quality—my first year growing from $5 packets of heirloom beans and lettuce produced more than I could eat. The key is knowing where to look beyond the big-box stores, and trusting seeds that might look "weird" but grow like crazy.
I’ve saved hundreds by swapping with neighbors, scouting local seed libraries, and buying bulk online during sales. Those tiny packets pack serious potential when you pick the right varieties.
Start with easy, high-yield crops like bush beans, radishes, or zucchini—they forgive mistakes and produce fast. My 5-gallon buckets of soil yielded pounds of zucchini from just three plants last summer.
Store-bought seeds often come with fancy labels, but the best deals hide in plain sight: check community bulletin boards, library seed swaps, or even the back of seed catalogs where "discontinued" varieties sometimes get marked down. A $2 packet can turn into a harvest worth $50 at the farmers market.
Once you’ve got your seeds, treat them right—proper storage means next year’s crop costs nothing. Keep them in a cool, dry spot (like your fridge’s veggie drawer) in airtight containers, and they’ll stay viable for years. I’ve grown 10-year-old tomato seeds that sprouted just fine.
The real magic happens when you plant them correctly: direct-sow hardy crops like peas and carrots, and start tender ones indoors under grow lights to beat the heat. Even a 2-foot-wide raised bed can feed two people all summer if you pick the right plants.
Here’s the best part: you’re not just saving money—you’re building a garden that works for your budget and your space. My $30 seed budget last year turned into a harvest that fed my family for months, with extras to share.
The secret isn’t fancy equipment or perfect conditions—it’s knowing where to look and how to make every seed count. Let’s get those packets planted!
📚 In This Guide
- What you need
- Instructions
- Tips and common mistakes
- Wrapping up and next steps
What you need
- ● Seeds: 1-2 packets of affordable, heirloom, or open-pollinated veg seeds (e.g., tomatoes, beans, lettuce, or peppers). Aim for 50-100 seeds per packet to maximize yield.
- ● Seed-starting trays or small pots: 2-4 biodegradable or plastic cell trays (2-3 inches deep) or yogurt cups, egg cartons, or recycled containers.
- ● Potting soil: 1-2 bags of seed-starting mix or lightweight potting soil (avoid garden soil—it’s too dense!).
- ● Watering can or spray bottle: A gentle misting spray bottle works best for seedlings.
- ○ Grow lights or sunny windowsill: A 10-15W LED grow light (optional but helpful) or a south-facing window with 6+ hours of sunlight.
- ● Gloves: A pair of gardening gloves to protect your hands from dirt and thorns.
- ● Trowel or small shovel: For transplanting seedlings into the ground or larger pots.
- ● Plant labels: Toothpicks + masking tape or store-bought labels to track seed varieties.
- ● Fertilizer: A balanced organic fertilizer (5-5-5 or 10-10-10) or compost tea for nutrient boosts.
- ● Mulch: Straw, grass clippings, or shredded leaves to retain moisture and suppress weeds.
- ● A dedicated space (indoor or outdoor) with access to sunlight or grow lights.
- ● Patience! Germination times vary—some seeds sprout in days, others take weeks.
- ● Basic knowledge: Check seed packets for planting depth, spacing, and sunlight needs.
Step-by-step guide to growing vegetables from cheap seeds
Here's how to turn those affordable seed packets into a thriving garden without breaking the bank.
Choose the Right Seeds for Your Climate and Season
Start by selecting seeds that match your USDA hardiness zone and current growing season. Cool-season crops like lettuce, spinach, and peas thrive in spring or fall when temperatures stay between 40-75°F. Warm-season vegetables such as tomatoes, peppers, and cucumbers need consistent warmth above 60°F to germinate and grow. Check the seed packet for planting dates—it often includes a month-by-month guide tailored to your region.
Look for heirloom or open-pollinated varieties—they’re often cheaper than hybrid seeds and can be saved for next year. Avoid seeds labeled "organic" if you're on a tight budget, as they tend to cost significantly more. Instead, opt for standard seed packets from reputable suppliers like Burpee, Park Seed, or local nurseries, which frequently offer discounts and bulk deals.
Prepare Your Growing Space and Soil
Vegetables need well-draining soil rich in organic matter, but you don’t need expensive amendments. Start with garden soil or a basic potting mix—just add compost or well-rotted manure (if available) to improve fertility. Work the soil to a depth of 12 inches, breaking up clumps and removing rocks or debris. This ensures roots can spread easily and access nutrients.
For container gardening, use 5-gallon buckets or recycled plastic bins with drainage holes. Fill them with a mix of potting soil and compost (a 50/50 blend works well). If you’re planting directly in the ground, space seeds according to the packet instructions—crowding leads to weak plants and poor yields. A simple string and stake method helps mark rows neatly without extra tools.
Plant Seeds at the Correct Depth and Spacing
Most seed packets include planting depth guidelines, but a general rule is to sow seeds twice as deep as their diameter. For example, tiny lettuce seeds go in ¼ inch deep, while larger beans or peas need 1 inch of soil coverage. Press seeds gently into the soil—don’t bury them too deeply, or they’ll struggle to break through. Use a small hand trowel or even a pencil to make individual holes if needed.
After planting, water gently but thoroughly to settle the soil around the seeds. Avoid soaking the area—you want the soil moist but not soggy. Place a lightweight mulch layer (like straw or grass clippings) over the top to retain moisture and suppress weeds. This step is especially important in hot, dry climates where seeds can dry out before germinating.
Maintain Moisture and Provide Adequate Light
Keep the soil consistently moist until seeds germinate, which usually takes 5-14 days depending on the vegetable. Use a spray bottle or watering can with a fine rose to avoid disturbing the seeds. Once seedlings emerge, reduce watering slightly but keep the soil evenly damp—not waterlogged. Overwatering can lead to damping-off, a fungal disease that causes young plants to collapse.
Most vegetables need 6-8 hours of sunlight daily, but young seedlings benefit from partial shade until they’re established. If growing indoors or in low-light areas, supplement with a budget-friendly LED grow light placed 6 inches above the plants. Watch for leggy seedlings (thin, stretched stems)—this is a sign they’re reaching for light. Rotate the containers quarter-turn daily to encourage even growth.
Thin Seedlings and Fertilize for Strong Growth
Once seedlings develop 2-3 true leaves (not just the initial seed leaves), thin them to the recommended spacing on the packet. Use scissors or your fingers to snip or gently pull excess plants—this prevents overcrowding and gives remaining seedlings room to thrive. Harvest thinned seedlings as microgreens for salads or pesto to avoid waste.
After thinning, apply a balanced, water-soluble fertilizer (like 10-10-10) at half-strength to avoid burning young roots. Feed every 2-3 weeks during the growing season, or switch to compost tea for a free, organic boost. Monitor plants for pests like aphids or cabbage worms—a strong spray of soapy water (1 tsp dish soap per gallon) usually does the trick without chemicals.
Tips & tricks for perfect budget-friendly vegetable gardens
These simple strategies will help you maximize your seed investment and grow a thriving garden without spending a fortune.
Seed Selection Strategy: When choosing seeds, prioritize those with high germination rates listed on the packet—this means fewer seeds wasted. I always look for packets labeled "treasure seed" or "heirloom" varieties, which often cost less than half of organic seeds but produce just as well. For example, a packet of 500 tomato seeds from a reputable supplier like Burpee can yield dozens of plants, while a single organic seedling might cost you $3 or more per plant.
Soil Preparation Hack: Don’t overlook the power of simple amendments—adding just 2 inches of compost to your garden soil can dramatically improve plant health without breaking the bank. I’ve found that mixing in a 50/50 blend of garden soil and compost (or even well-rotted manure) creates the perfect growing medium. This approach costs pennies compared to store-bought potting mixes and yields better results for my vegetables.
Watering Wisdom: The key to consistent moisture is using the right tools—a simple spray bottle or watering can with a fine rose attachment makes all the difference. I’ve learned the hard way that overwatering leads to damping-off disease, so I always check soil moisture by sticking my finger about an inch deep. If it feels dry, that’s when I water again. This method saves water and prevents wasted seeds.
Lighting Solutions: For indoor or low-light growing, a basic LED grow light placed just 6 inches above seedlings can work wonders. I’ve used dollar-store clip-on lights with great success—just make sure to rotate your containers daily to prevent leggy growth. This simple setup costs less than $15 and gives you control over your plants’ light exposure, especially during shorter winter days.
Pro Tips for Cheap Veg Seeds
- These simple strategies will help you maximize your seed investment and grow a thriving garden without spending a fortune.
- Seed Selection Strategy: When choosing seeds, prioritize those with high germination rates listed on the packet—this means fewer seeds wasted.
- Soil Preparation Hack: Don’t overlook the power of simple amendments—adding just 2 inches of compost to your garden soil can dramatically improve plant health without breaking the bank.
Frequently asked questions
Got questions about growing veggies on a budget?
You’re not alone! Here are answers to the most common concerns about cheap veg seeds—from timing to troubleshooting—so you can grow like a pro without breaking the bank.
Can I grow vegetables from seeds I find in my grocery bag?
Some veggies—like tomatoes, peppers, or cucumbers—can sprout from store-bought seeds (just wash and dry them first!). However, cheap veg seeds from seed packets are more reliable and often treated for disease resistance. Save seeds from heirloom varieties for next season, but avoid hybrid or treated seeds (like those from avocados or citrus).
How long do cheap veg seeds stay viable?
Most seeds last 1–5 years if stored properly (cool, dry, and dark). Check the packet for a germination rate—aim for 80% or higher. For long-term storage, seal seeds in airtight containers with silica gel or a moisture absorber. Pro tip: Test a few seeds in damp paper towels before planting your whole batch!
Are cheap veg seeds as good as expensive ones?
Not always! Cheap veg seeds can vary in quality—look for reputable sellers (like local nurseries or online stores with high ratings) and check for organic certification or non-GMO labels if that matters to you. Seed swaps (online or in-person) are a great way to get free, local varieties. Skip seeds from unknown sources—they might be old, low-quality, or even contaminated.
What’s the best time to plant cheap veg seeds?
Timing depends on your climate and the veggie! Cool-season crops (like lettuce, peas, or spinach) thrive in early spring or fall, while warm-season veggies (tomatoes, beans, peppers) need soil temps above 60°F (15°C). Check your seed packet for days to maturity and plant accordingly. Extension offices or local gardening groups can help with frost-date advice!
Why aren’t my cheap veg seeds sprouting?
Don’t panic! Common culprits include old seeds, poor soil (too wet/dry), or incorrect depth (most seeds need 2x their size buried). Try soaking seeds overnight for stubborn varieties, or test germination with a damp paper towel. If still no luck, your seeds may be viability-expired—time to order new cheap veg seeds!
Can I grow vegetables indoors with cheap seeds?
Container-friendly veggies
like herbs, lettuce, radishes, and dwarf tomatoes thrive indoors with 6+ hours of light (grow lights work great). Use small pots (5–12 inches deep) and a well-draining mix. Pro tip: Start with fast-growing seeds (like microgreens or radishes) to test your setup before committing to bigger plants.
Wrapping up and next steps
Growing your own veggies from cheap veg seeds is a rewarding journey that saves money, freshens up your meals, and connects you to nature—no green thumb required! 🌱 Whether you’re a seasoned gardener or a curious beginner, these budget-friendly blooms prove that big harvests start with tiny seeds.
Now’s the perfect time to grab a packet, roll up your sleeves, and turn your space (even a sunny windowsill!) into a thriving garden.
Ready to dive in? Start small:
- Pick one easy seed (like lettuce or radishes) to build confidence.
- Check your local dollar store or online deals for cheap veg seeds—you’ll be surprised how affordable it is!
- Plant today and watch your patience grow into fresh, homegrown goodness!